The instructions below will walk you through how to authorize Modeloptic to retrive data from your NetSuite account. If you'd like help on any part of this process or run into any issues, please don't hesitate to contact us and we'll be happy to assist!
NetSuite <-> Modeloptic Connection Instructions
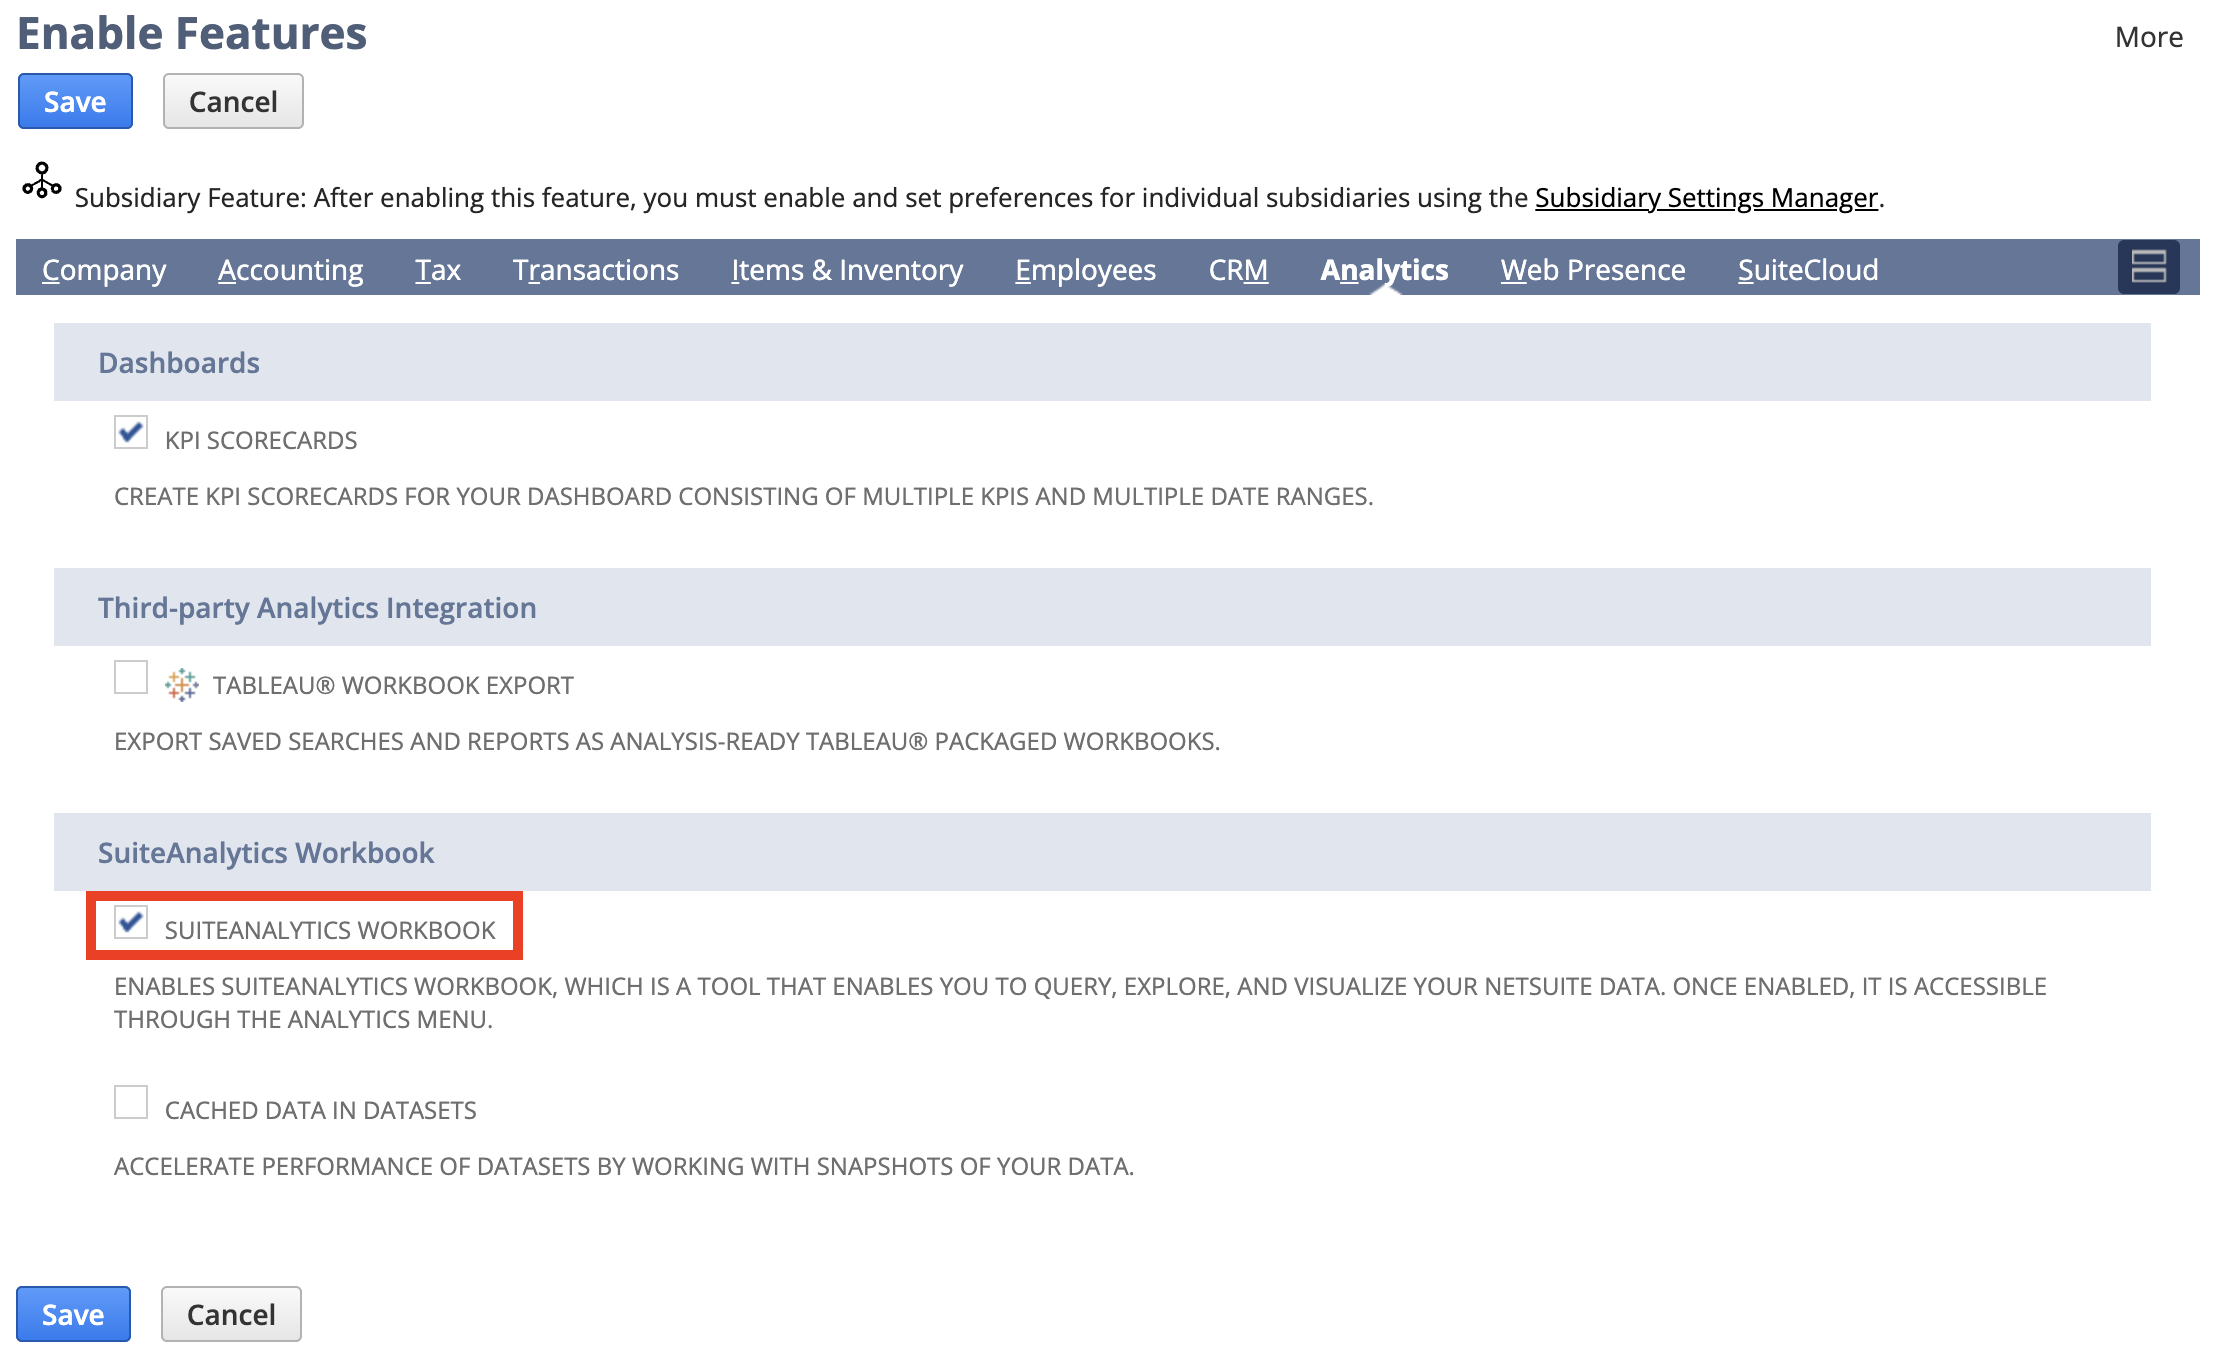
Ensure that the appropriate features are enabled in your account
- Go to Setup > Company > Enable Features
- Under the "Analytics" section, under the "SuiteAnalytics Workbook" section, check the box for "SuiteAnalytics Workbook"
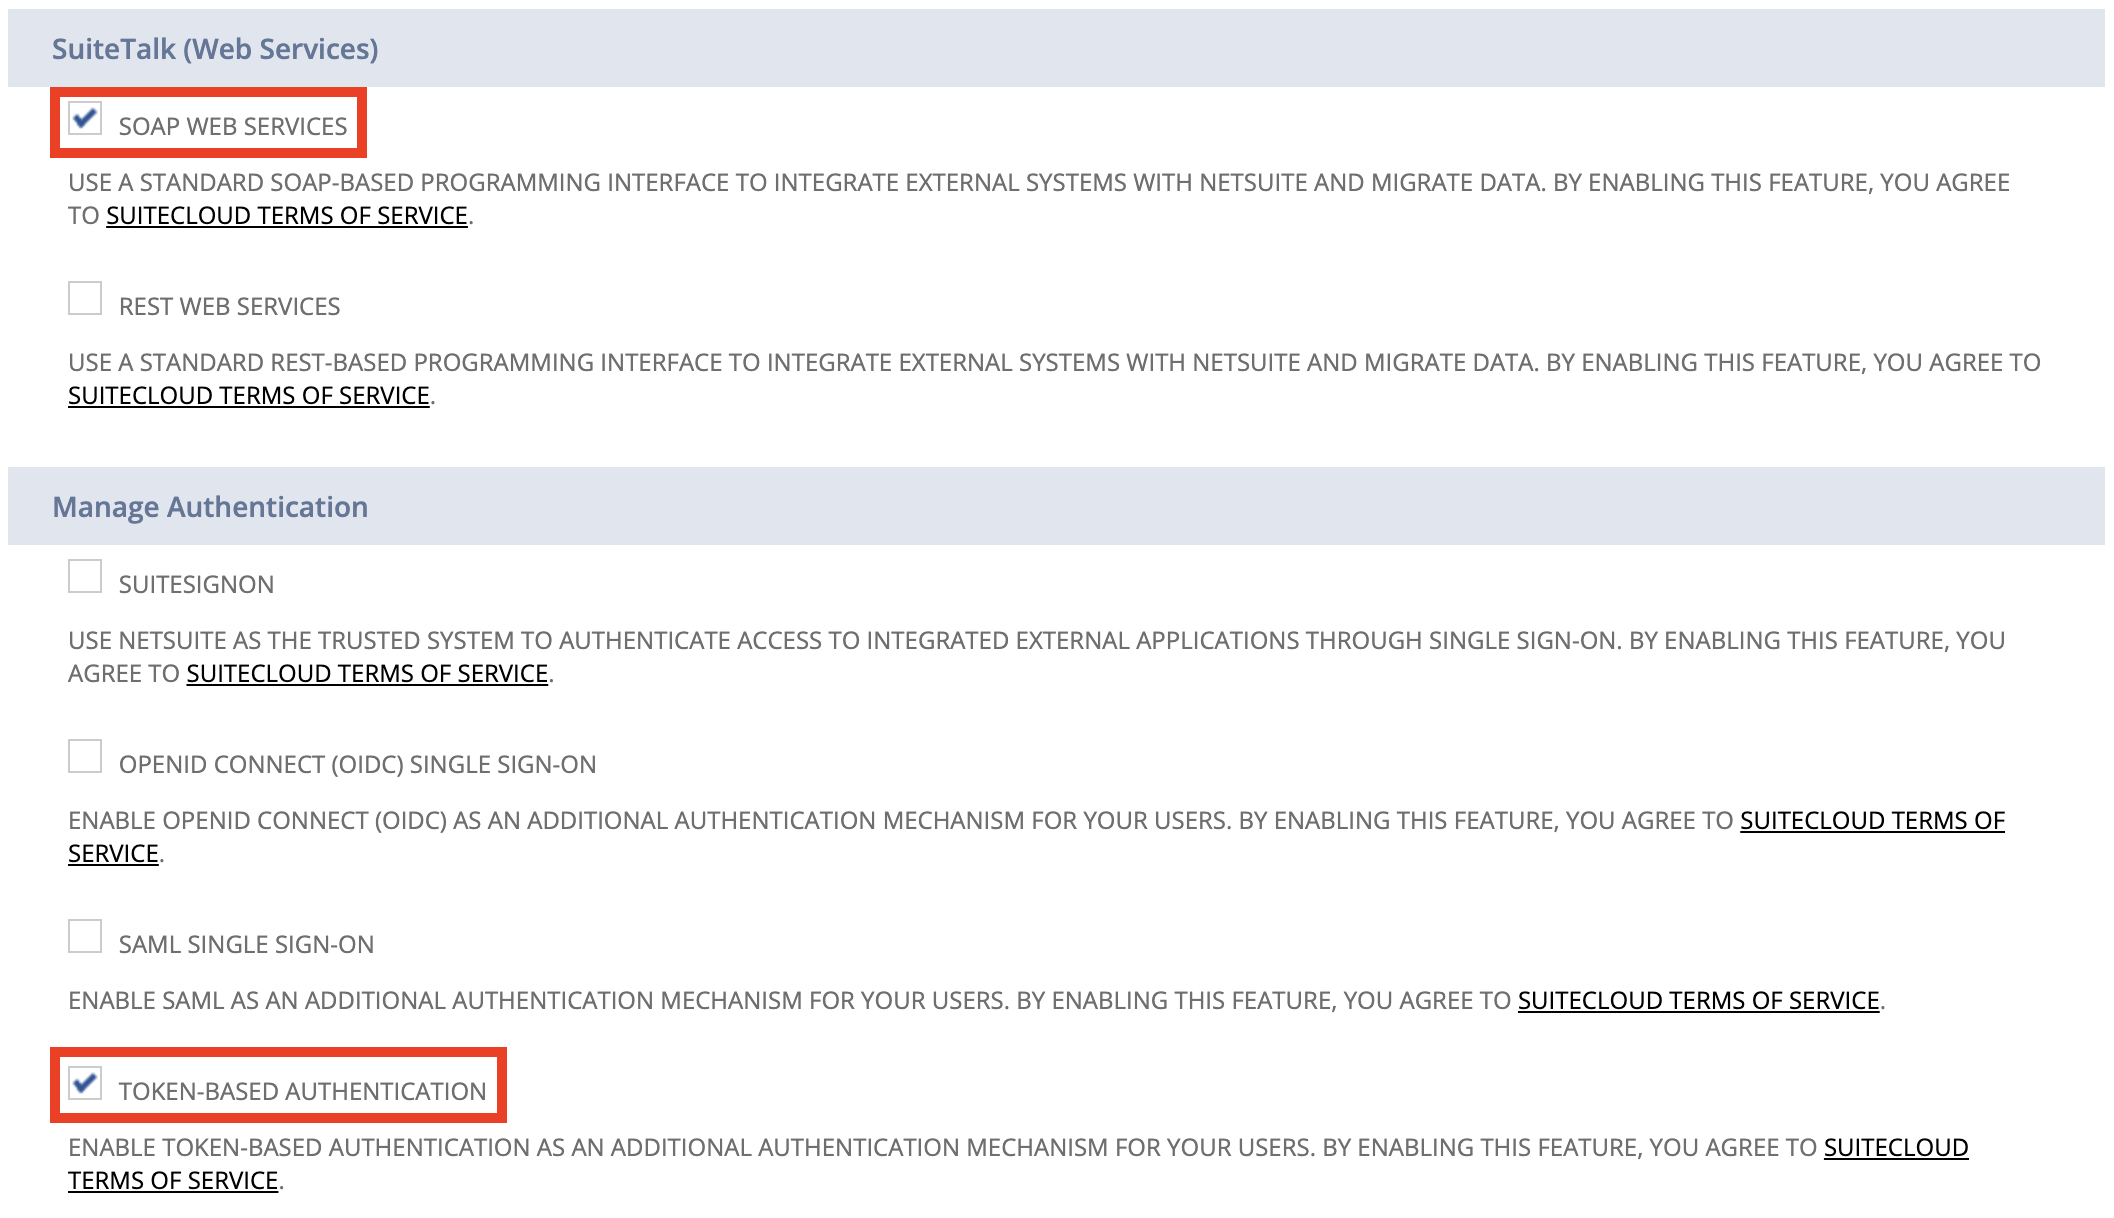
- Under the "SuiteCloud" section:
- Under the "SuiteTalk (Web Services)" subsection, check the box for "SOAP Web Services"
- Under the "Manage Authentication" subsection, check the box for "Token-Based Authentication"
- Hit the Save button
Create a user role for the integration
- Go to Setup > Users/Roles > Manage Roles > New
- For the name, enter "Modeloptic Integration Role"
- If your company has multi-entity subsidiaries set up, under "Accessible Subsidiaries", select the option for "All"
- Check the box for "Web Services Only Role"
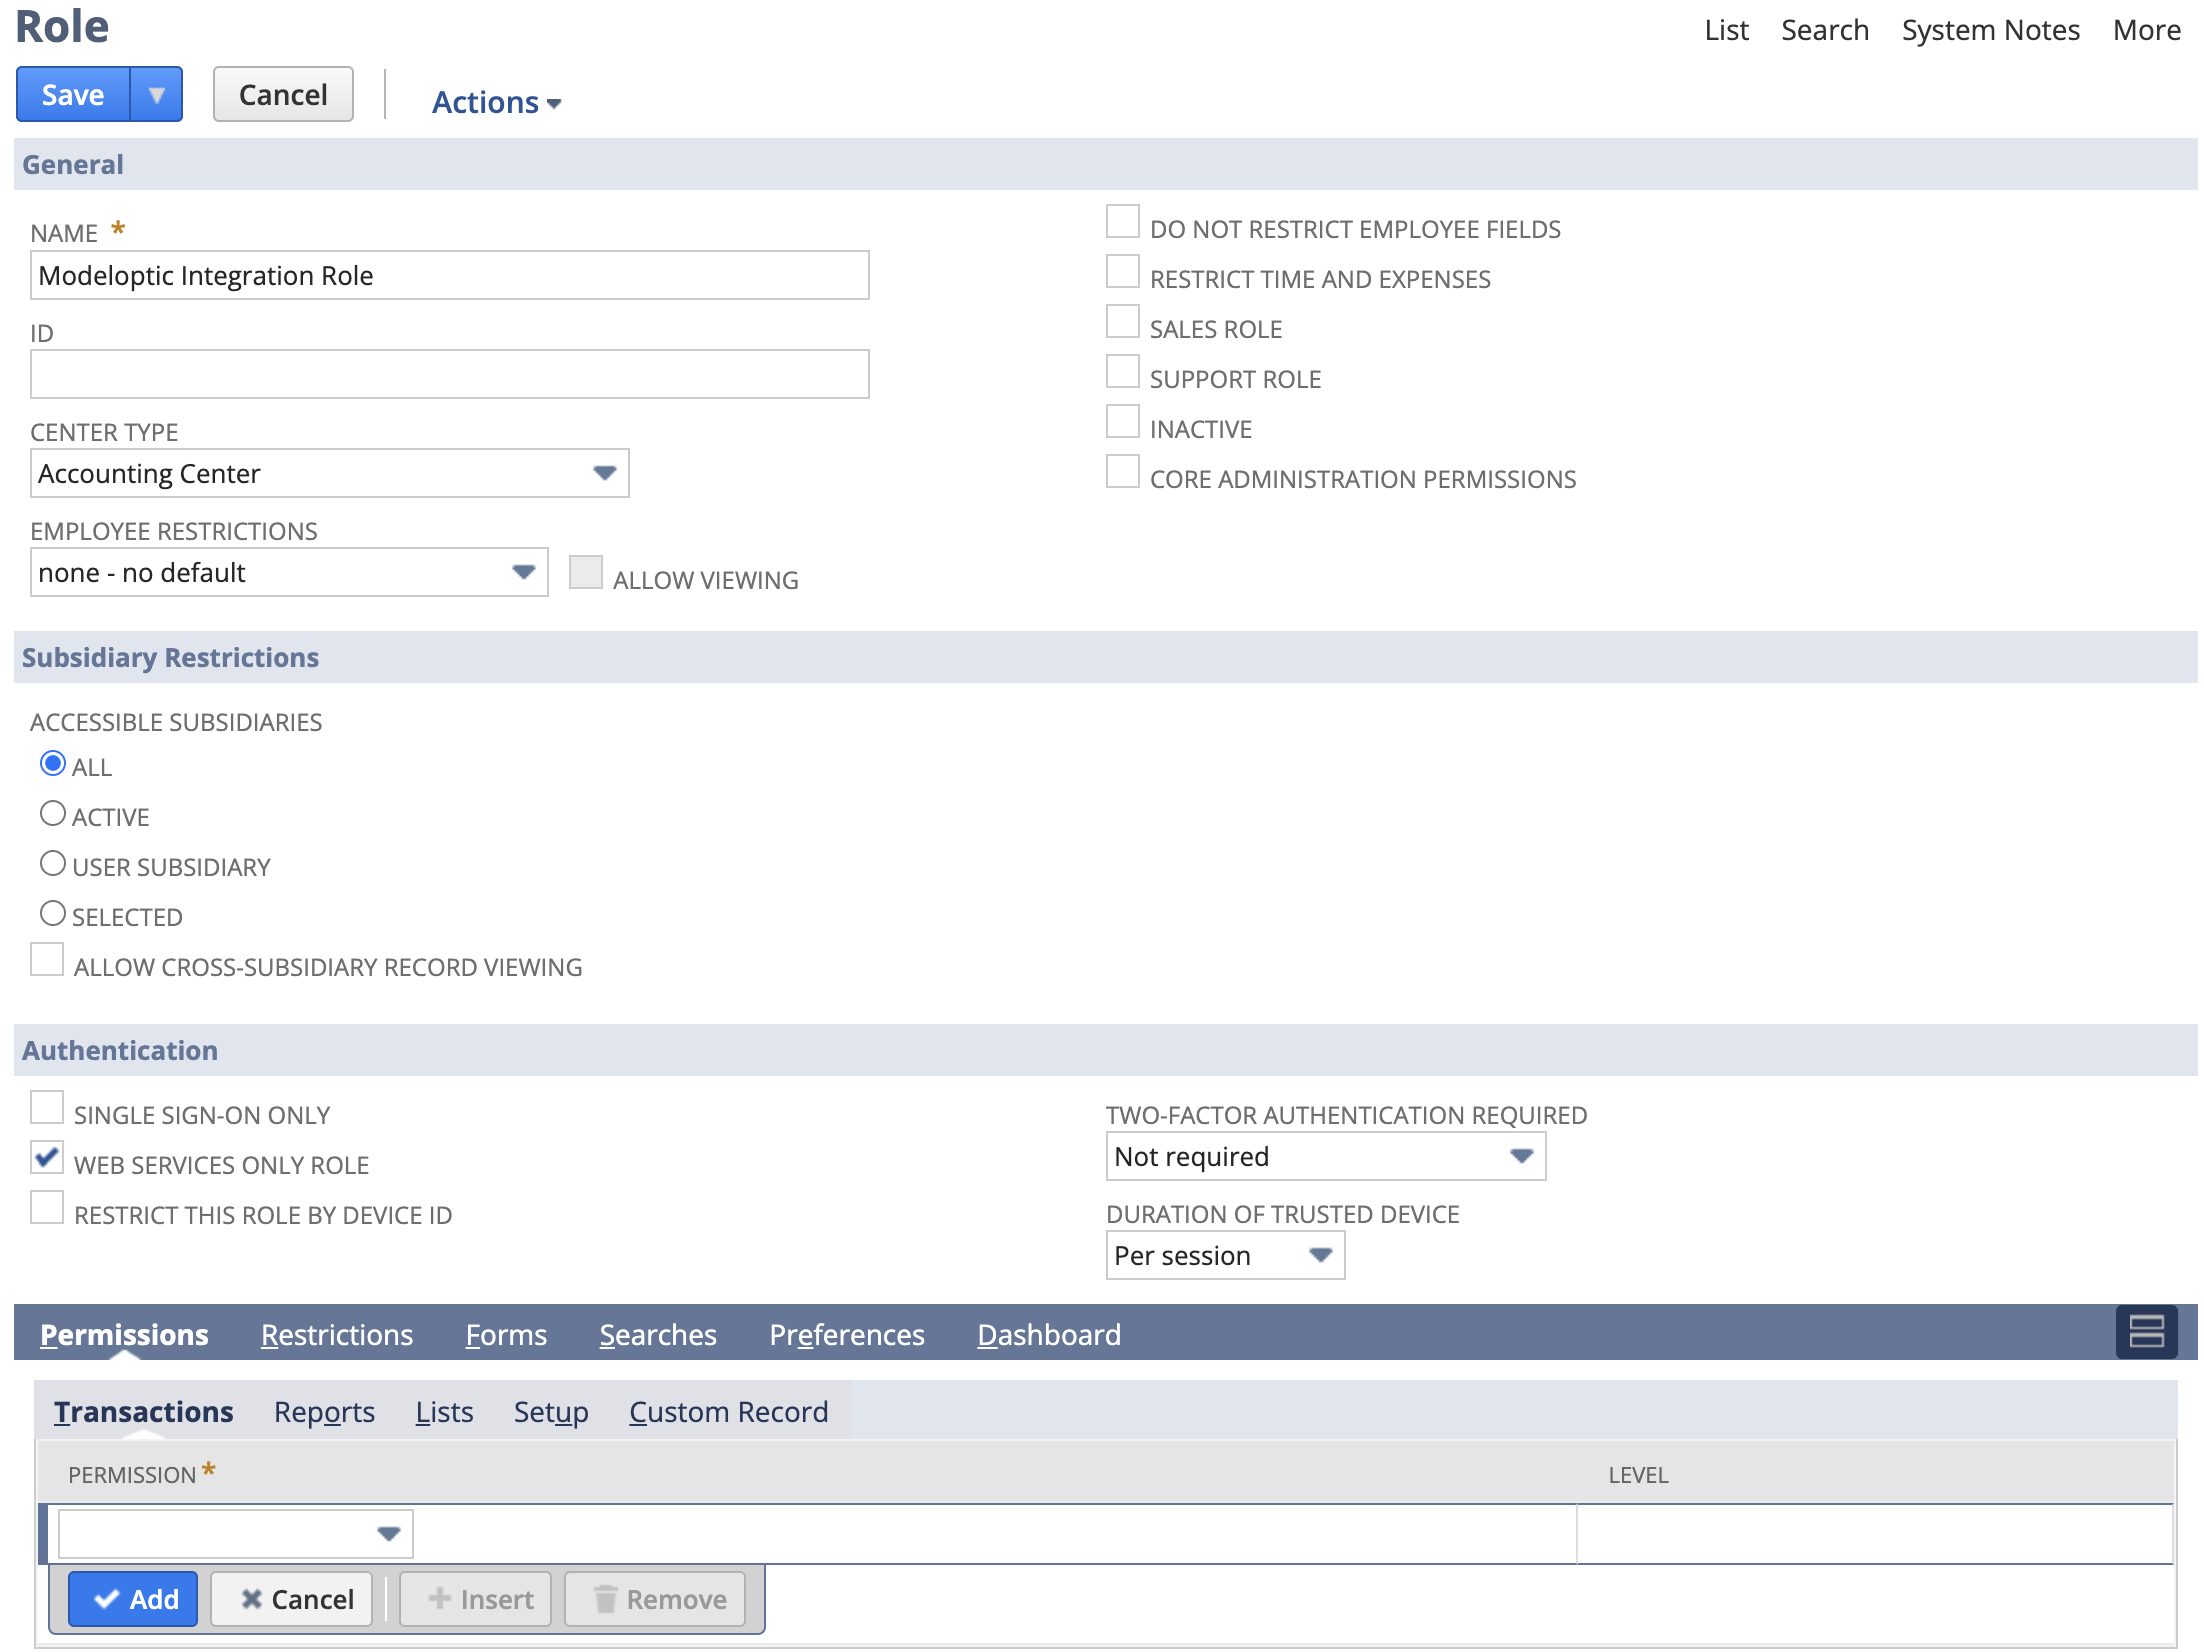
- For the permissions, add in the ones detailed in the file that you can download here:
- Hit the Save button
Assign that user role to one of the active user accounts
- Go to Setup > Users/Roles > Manage Users
- Click on the name of user in the list you'd like to assign the integration role to
- Hit the Edit button
- Scroll down and click on the "Access" sub header link
- Under "Roles", in the dropdown menu, select "Modeloptic Integration Role" and hit the Ok button
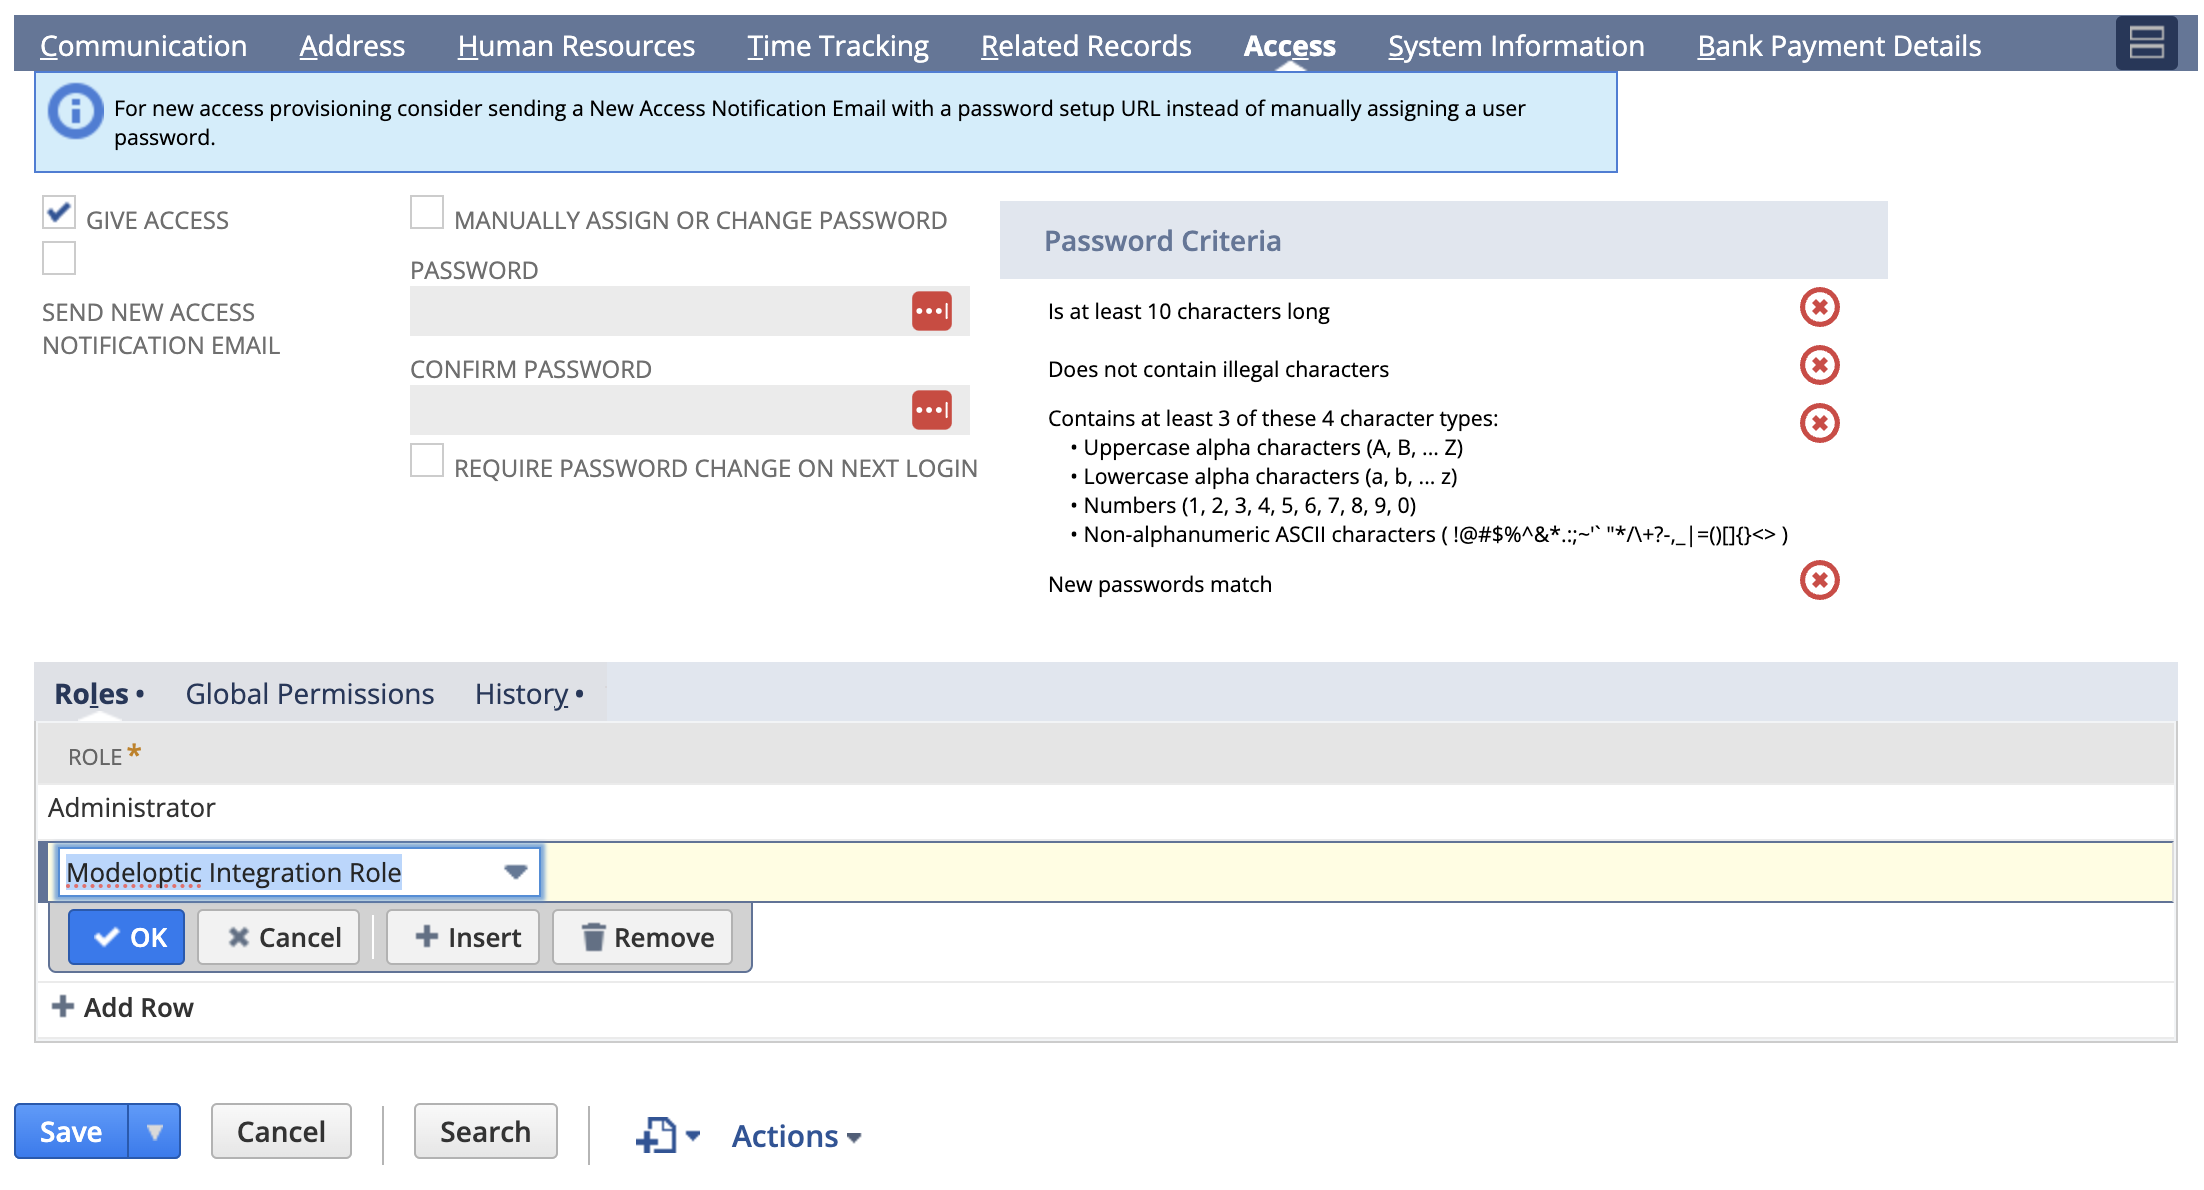
- Hit Save
Create an integration record
- Go to Setup > Integration > Manage Integrations > New
- Under Name, enter "Modeloptic Integration"
- Check the "Token-Based Authentication" box. Uncheck any other boxes in this section and in the other authentication method sections shown (including OAuth)
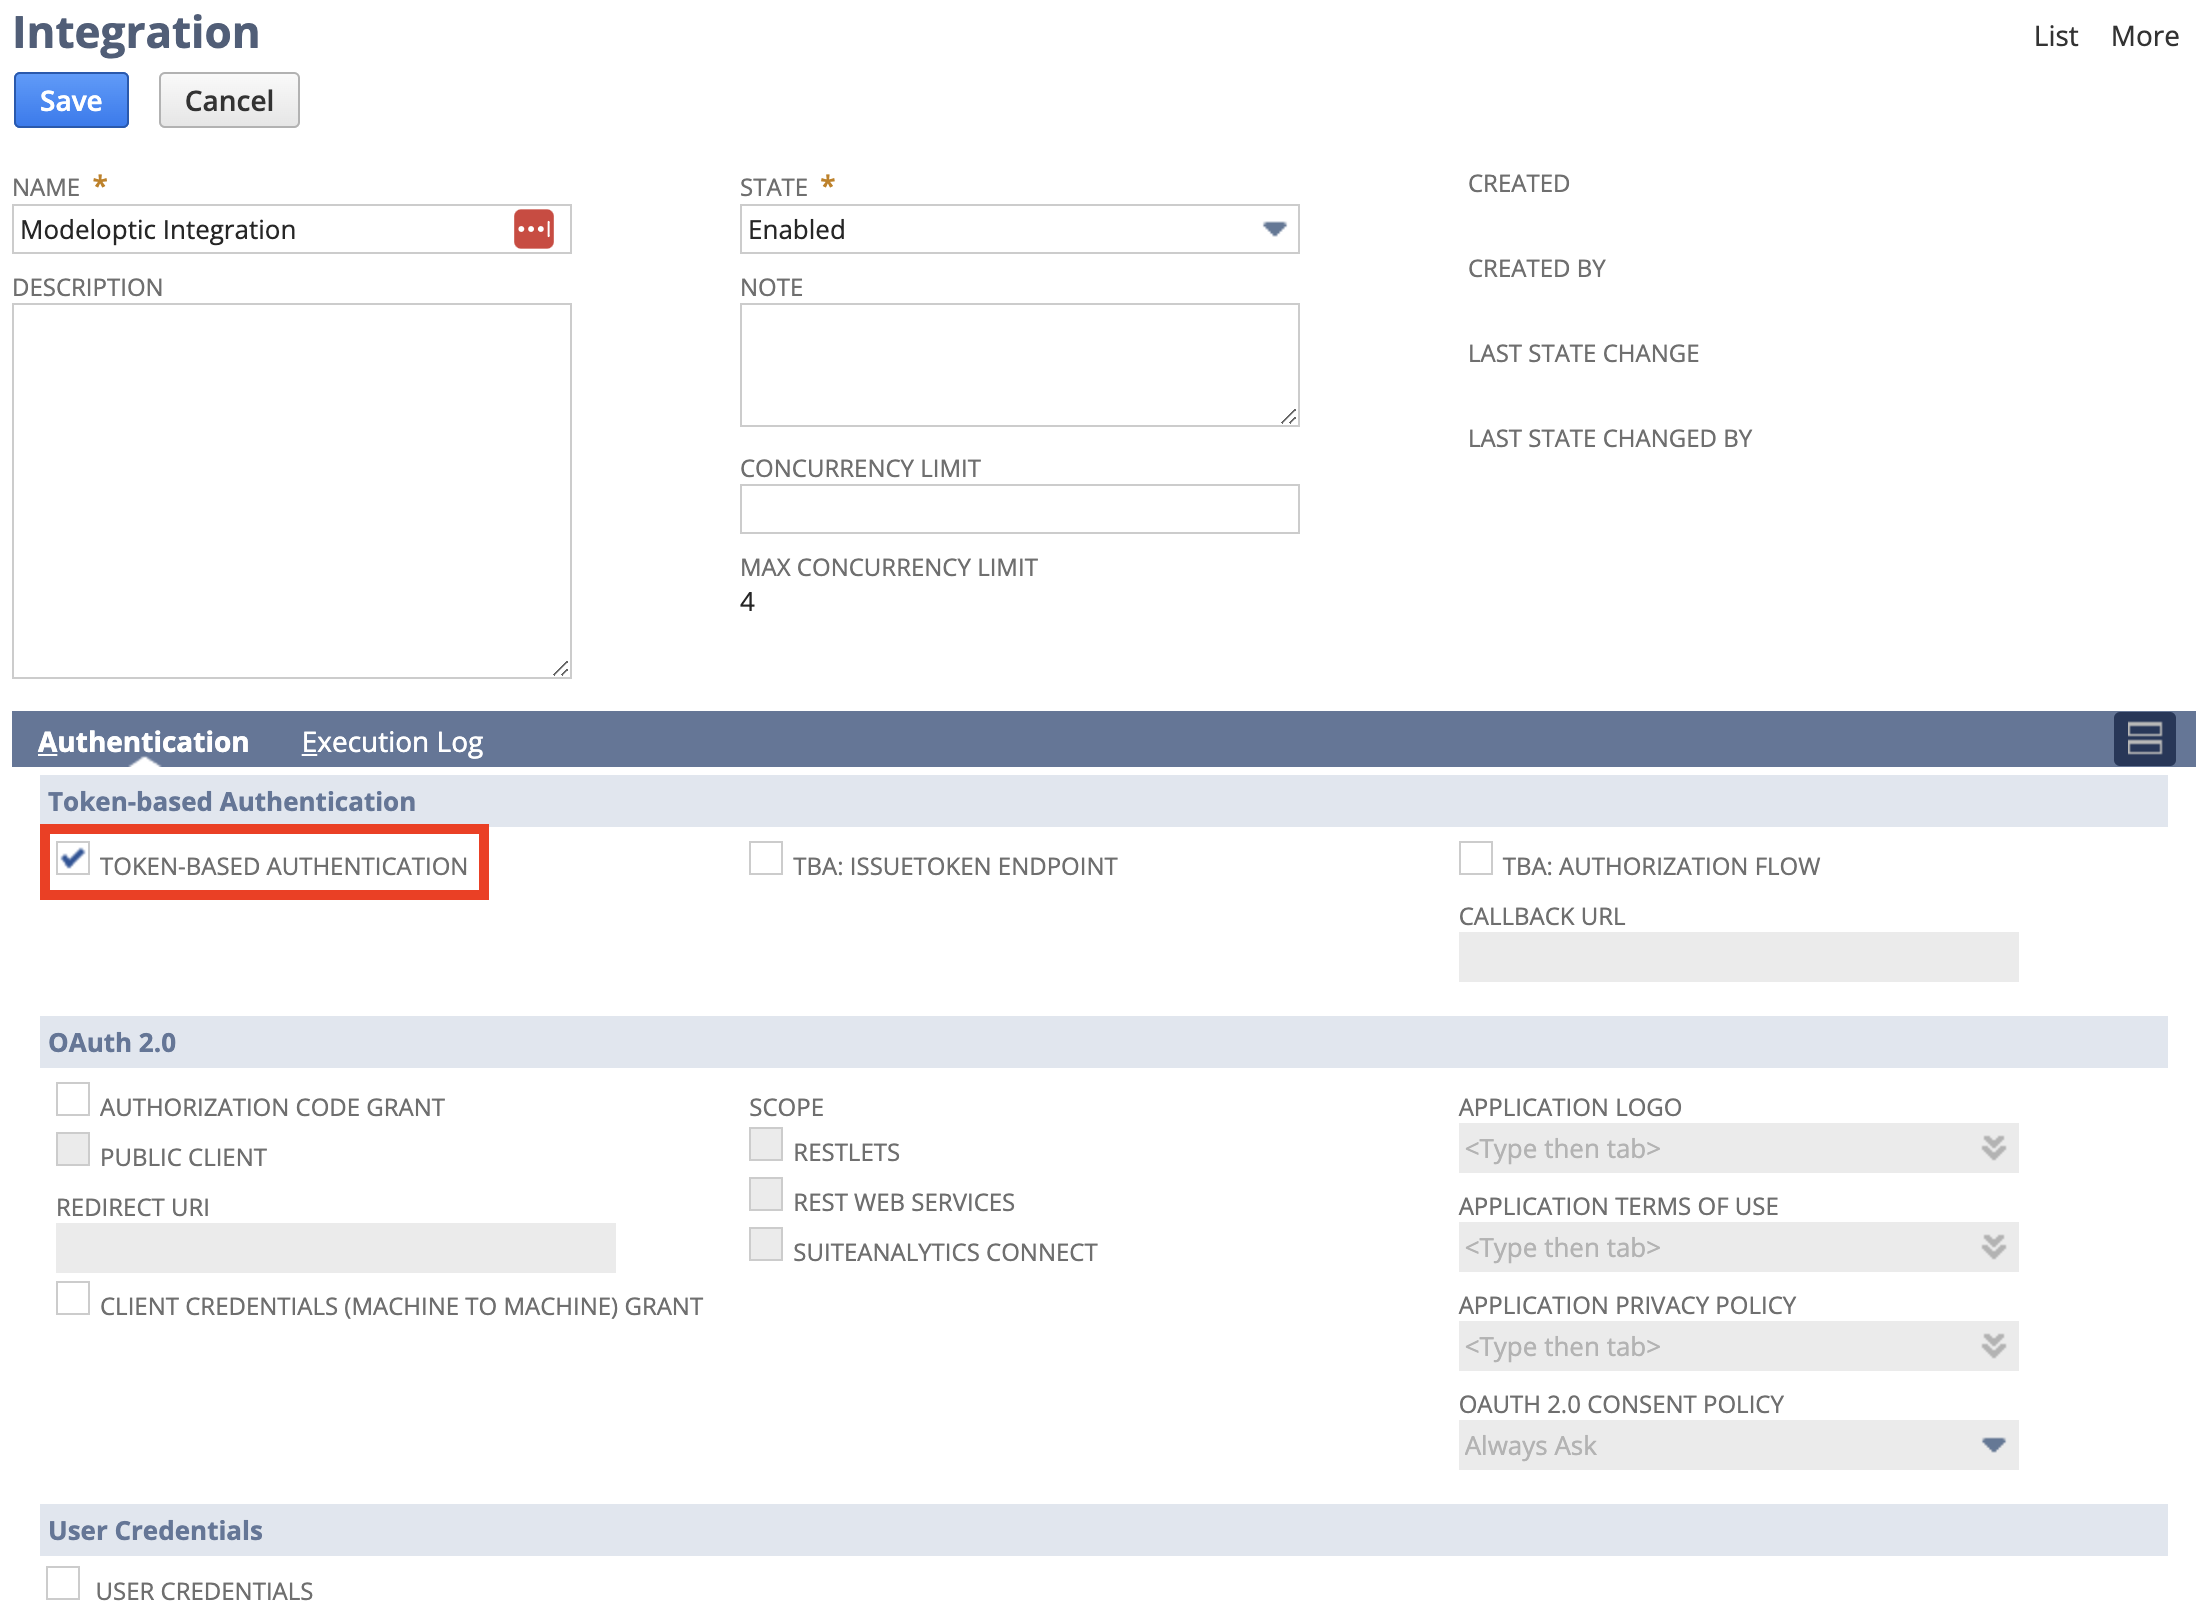
- Hit the Save button
- It will then display the integration Consumer Key and Consumer Secret
- NOTE: RECORD THESE FOR ENTRY INTO MODELOPTIC - THEY'LL ONLY BE DISPLAYED ONCE
Create an access token
- Go to Setup > Users/Roles > Access Tokens > New
- Under Application Name enter "Modeloptic"
- Under the User dropdown, select the user that you assigned the "Modeloptic Integration Role" to in step 2 above
- Under the Role dropdown, select "Modeloptic Integration Role"
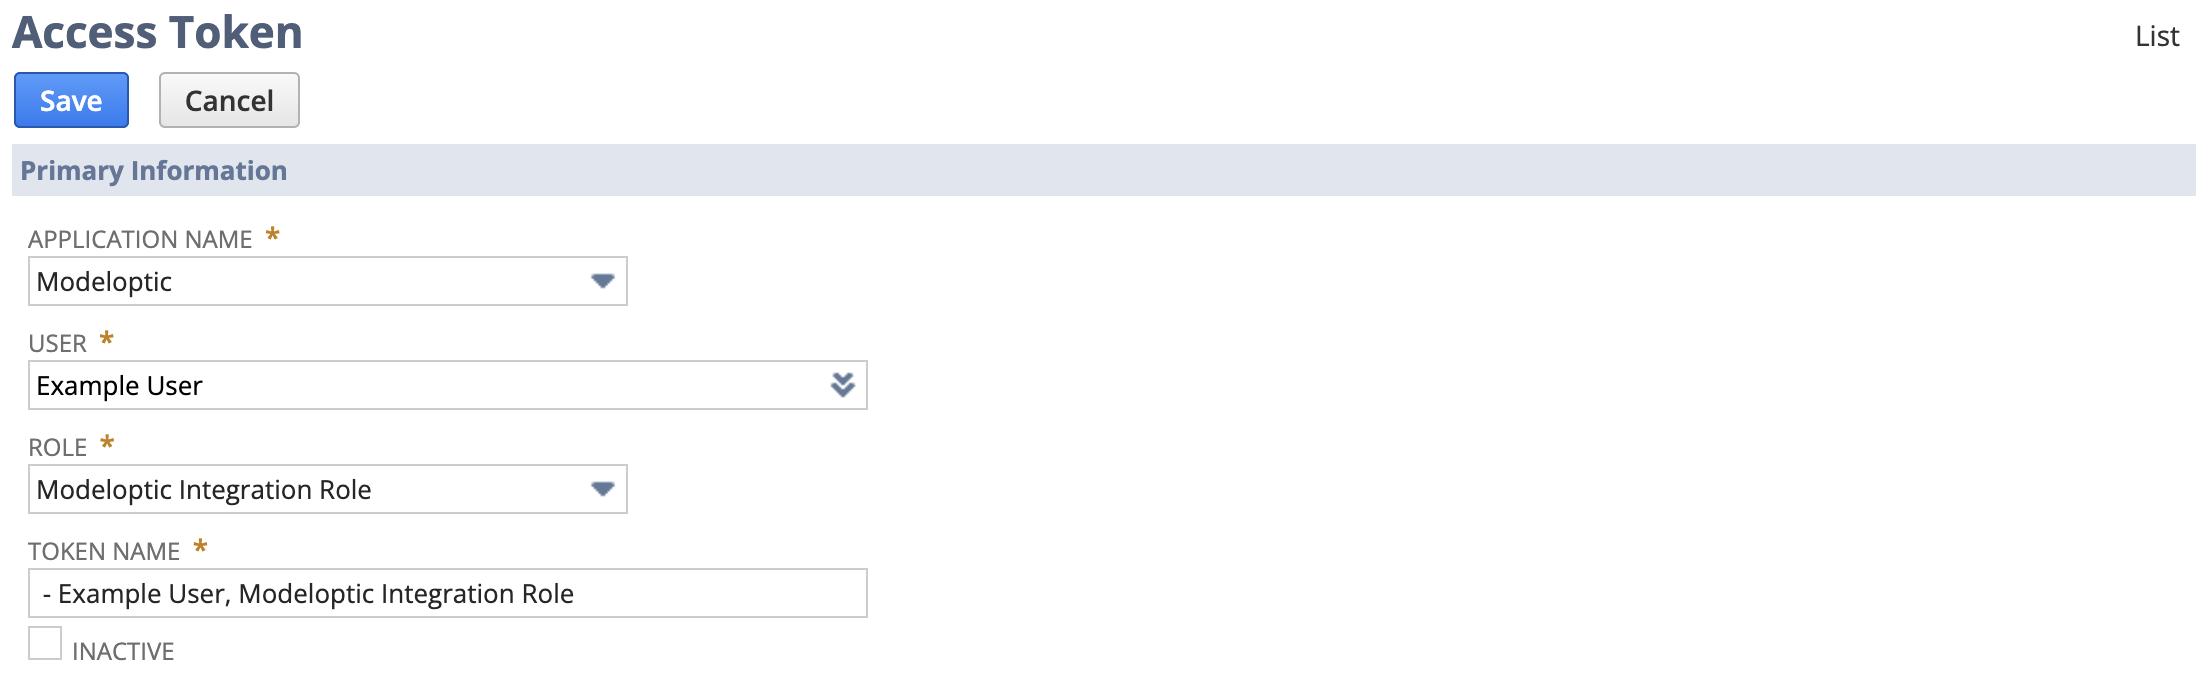
- Hit the Save button
- It will then display the Token ID and Token Secret
- NOTE: RECORD THESE FOR ENTRY INTO MODELOPTIC - THEY'LL ONLY BE DISPLAYED ONCE
Download the RESTlet script to enable database querying
By loading this script file into your NetSuite account, we'll be able to query the database that contains your company's financials in order to sync it with Modeloptic.
Upload the RESTet script to the Company's Netsuite Account
- In the menu, go to Customization > Scripting > Scripts > New
- When you hover over the dropdown menu on the page, a "+" icon will appear. Clicking that will open a new popup window
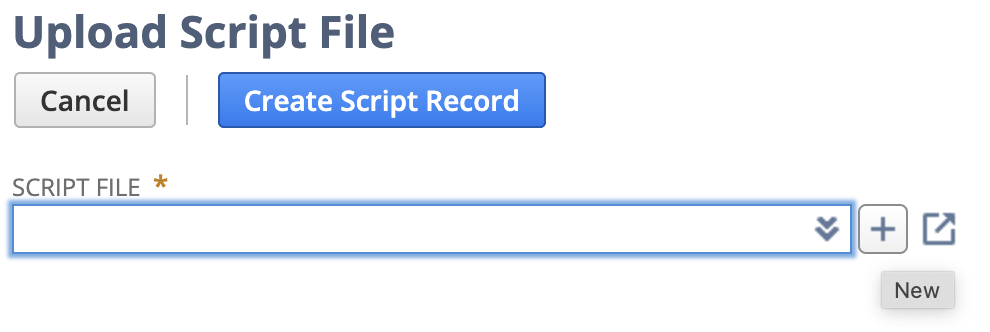
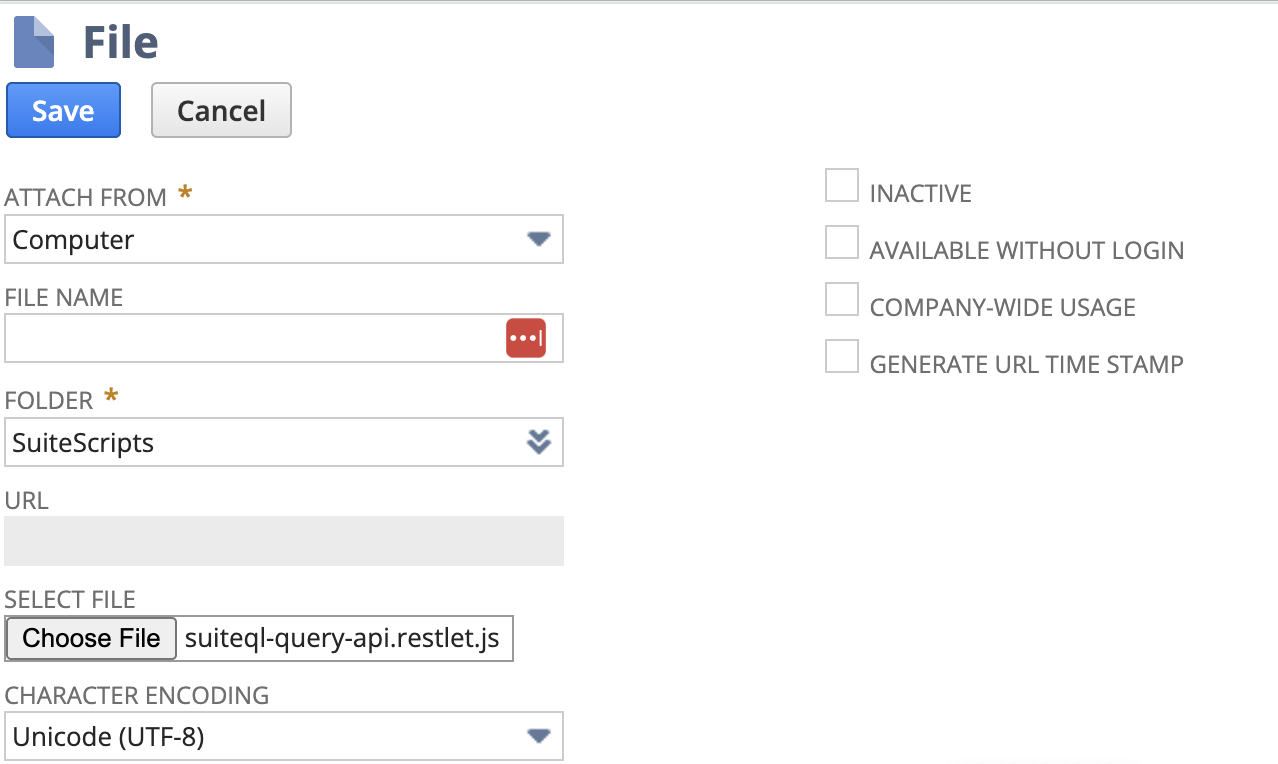
- Click "Choose File", and select the attached "suiteql-query-api.restlet.js" file. Click Save, which will close the popup window
- Click "Create Script Record" button, and another form will appear
- In that form:
- Set the Name to "SuiteQL Query API"
- Set the ID to "_suiteql_query_api"
- Under "Deployments", add a new line with Title "SuiteQL Query API", change the Status to "Released", and click Add
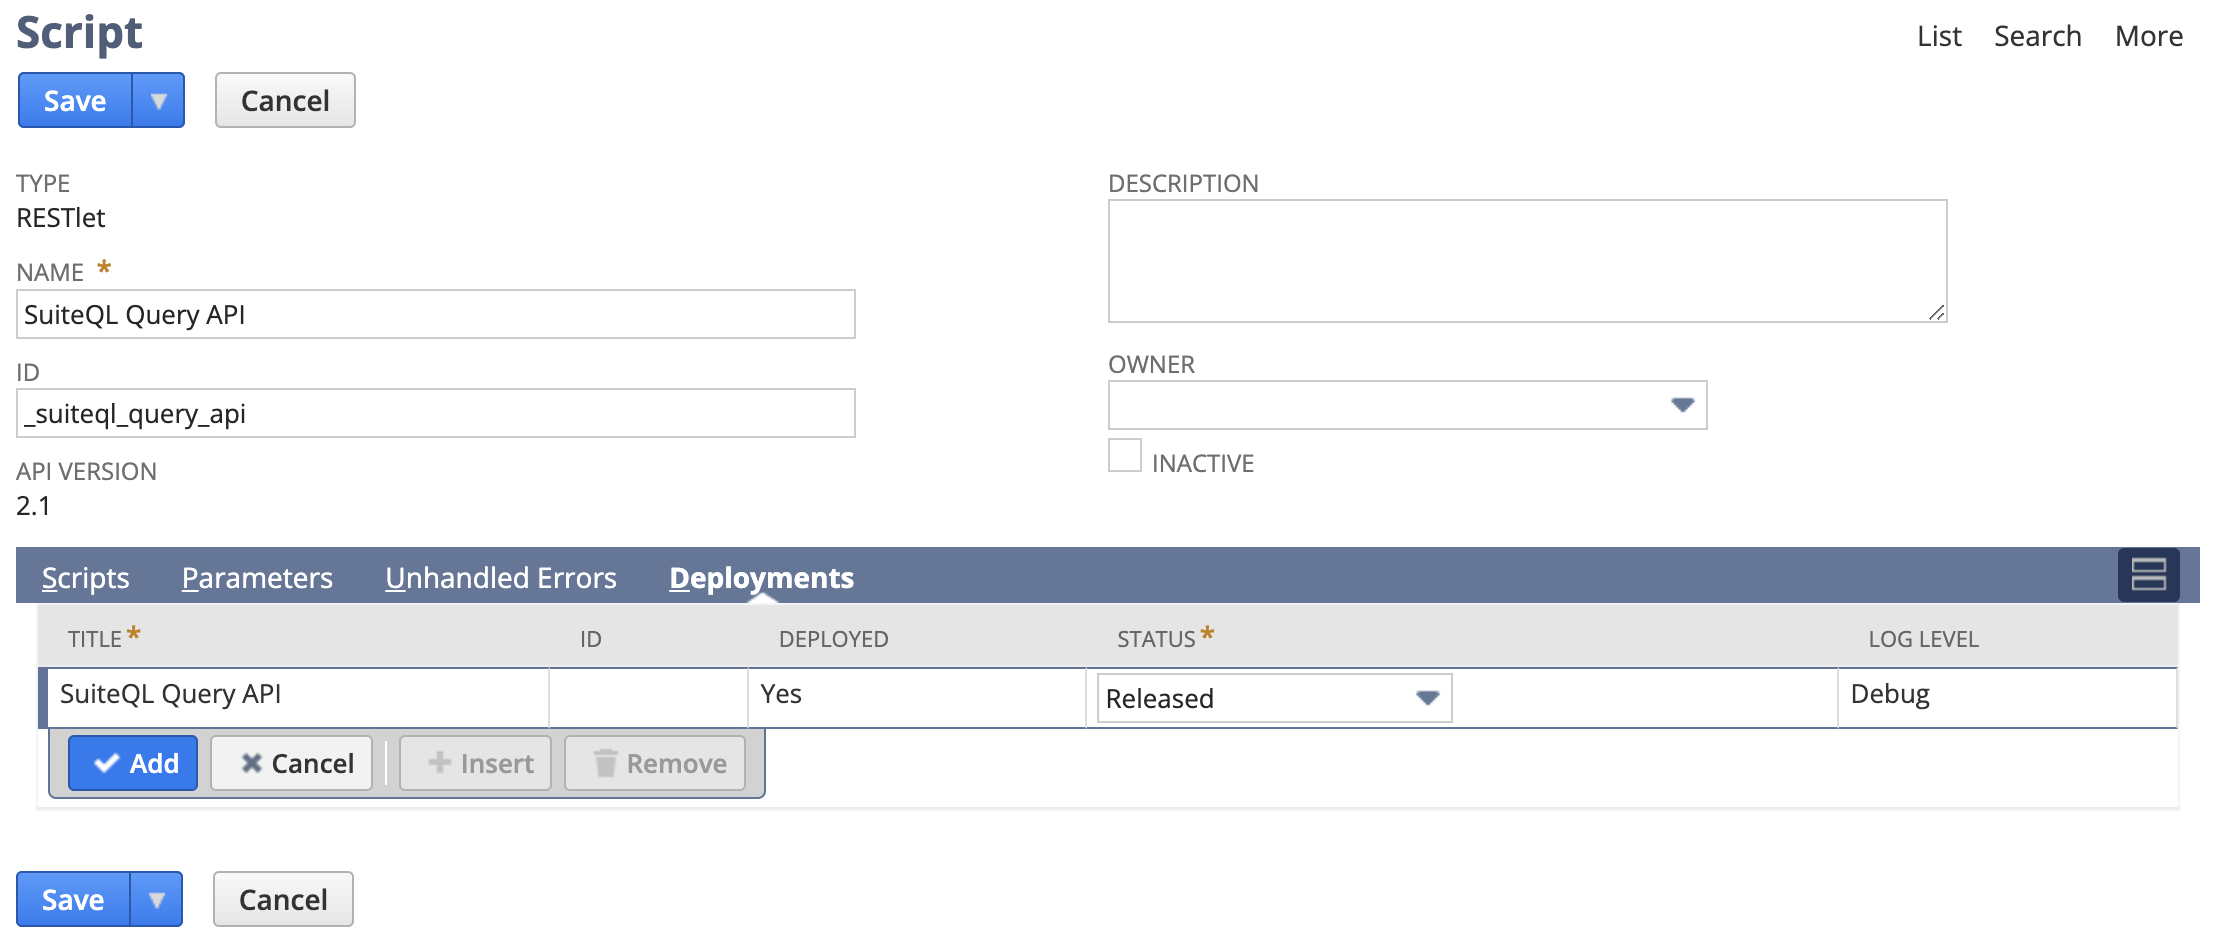
- Click the Save button
Update the Modeloptic Integration Role to have access to this script
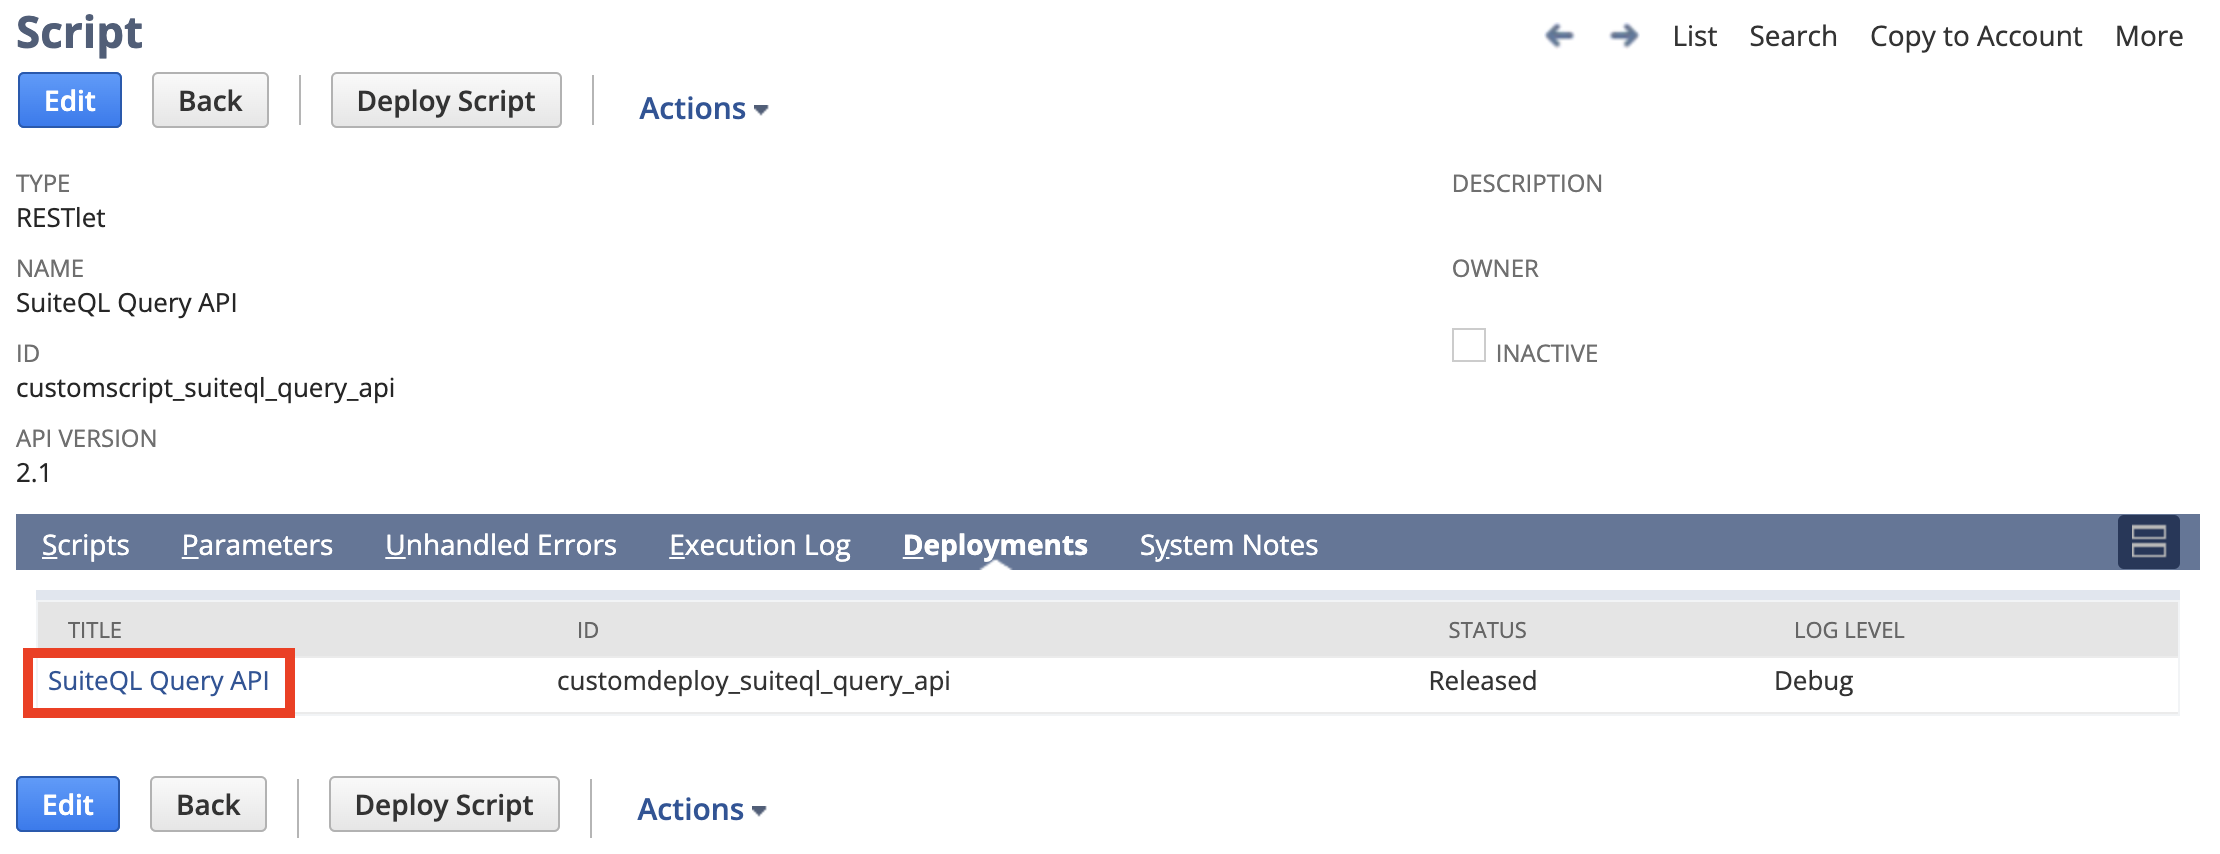
- In the menu, go to Customization > Scripting > Scripts
- Find the "SuiteQL Query API" script we uploaded in the list and click View
- Click on the "Deployments" tab, then click on the "SuiteQL Query API" name to open the Script Deployment page
- Click on the "Edit" button
- On the "Audience" tab, in the "Roles" box, find "Modeloptic Integration Role", select it, and hit Save
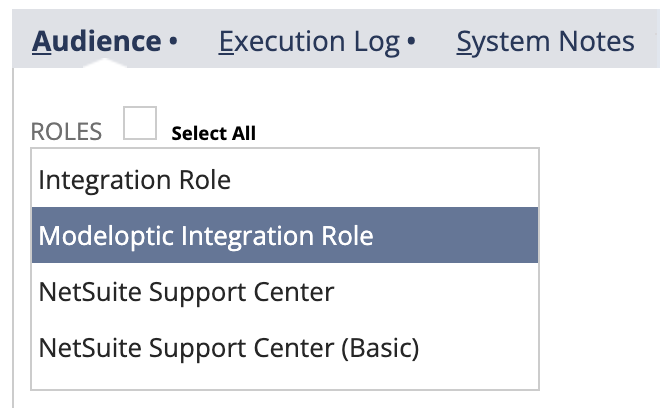
- NOTE: RECORD THE "External URL" FOR ENTRY INTO MODELOPTIC
Obtain the company's Account ID
- Go to Setup > Company > Company Information
- NOTE: RECORD THE ID SHOWN UNDER "ACCOUNT ID" FOR ENTRY INTO MODELOPTIC
Enter Credentials into Modeloptic
Log in to Modeloptic, navigate to the Historical Data page for your company, and click into your NetSuite Data Connection. You should see a section that looks as follows:
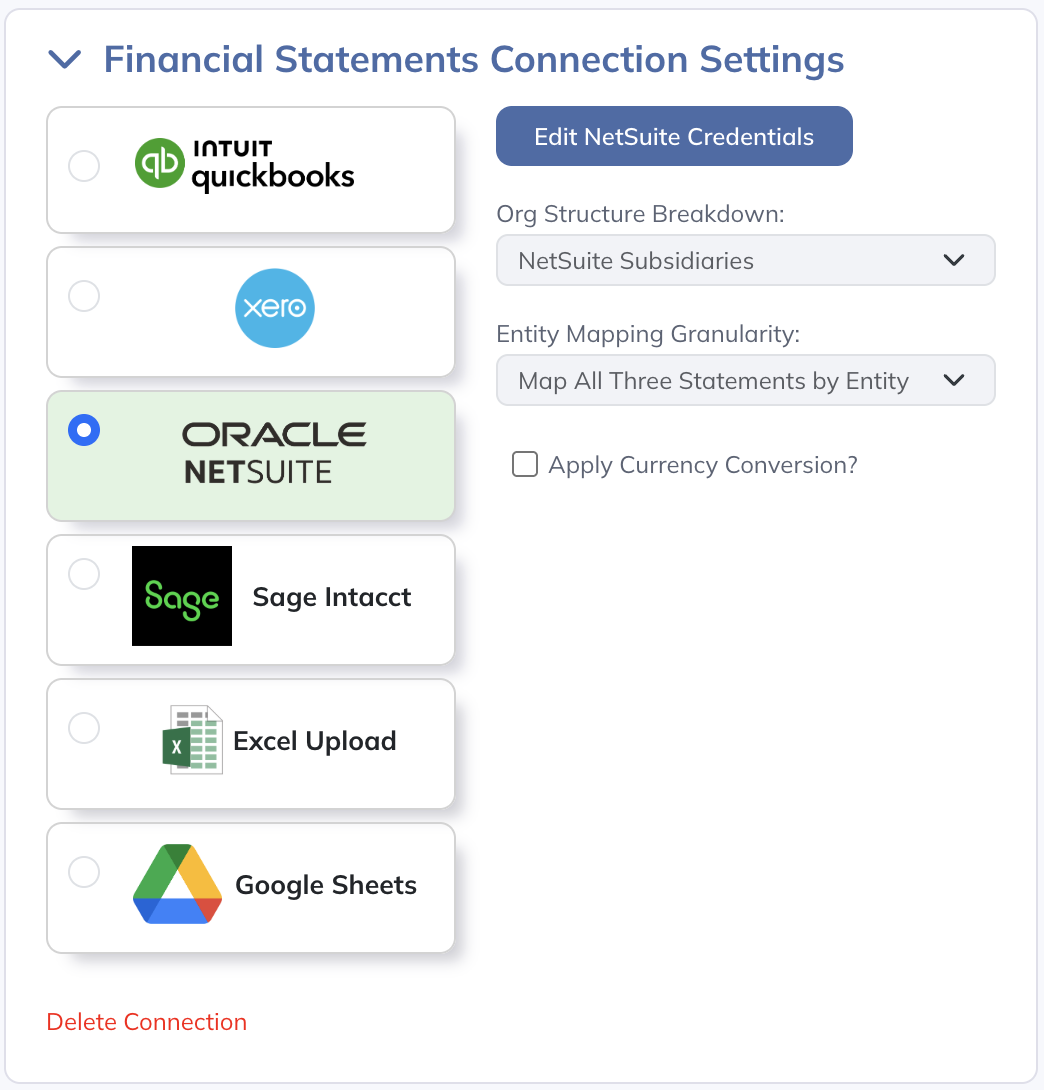
Click on "Edit NetSuite Credentials", which will open up the following screen:
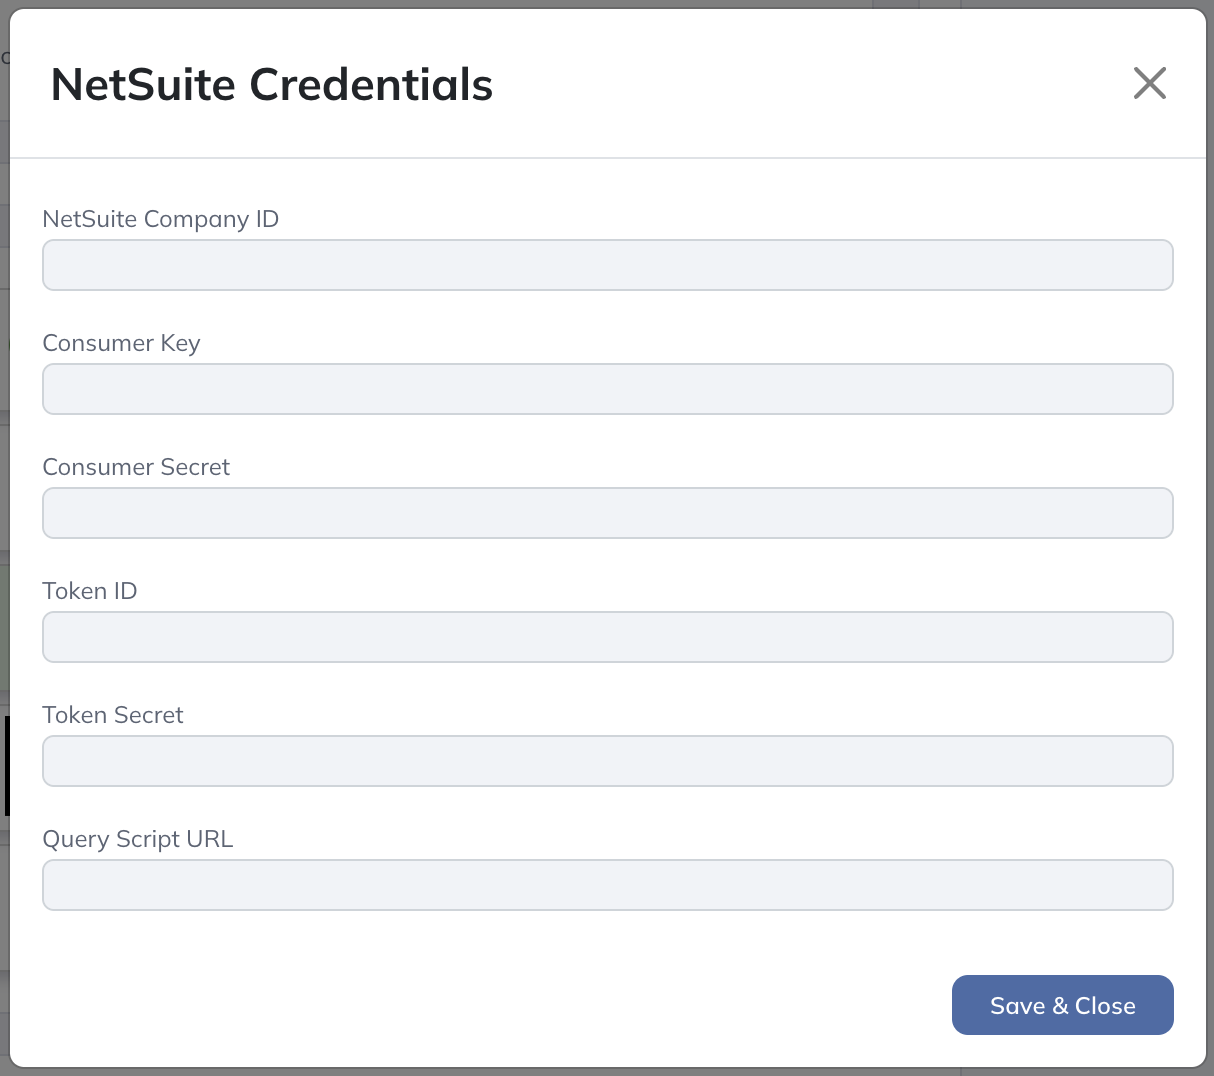
Enter all of the data points shown here (which you should have recorded from the prior steps), and click "Save & Close".
Your integration should now be live!
Powerful and Intuitive Financial Reporting and Projections
© 2025 Modeloptic, LLC. All Rights Reserved.
The Future of Finance
Ready to try out Modeloptic for your company?
Powerful and Intuitive Financial Reporting and Projections
© 2025 Modeloptic, LLC. All Rights Reserved.