The instructions below will walk you through how to authorize Modeloptic to retrive data from your Sage Intacct account. If you'd like help on any part of this process or run into any issues, please don't hesitate to contact us and we'll be happy to assist!
Sage Intacct <-> Modeloptic Connection Instructions
Enable Web Services
- Company -> Admin tab -> Subscriptions
- Find "Web Services" and click on it to Subscribe
- Ignore the warning about additional charges (you won't be charged)

Add Modeloptic under Web Services Authorizations
- Company -> Setup tab -> Configuration header -> Company
- Click Edit
- Click on the "Security" tab
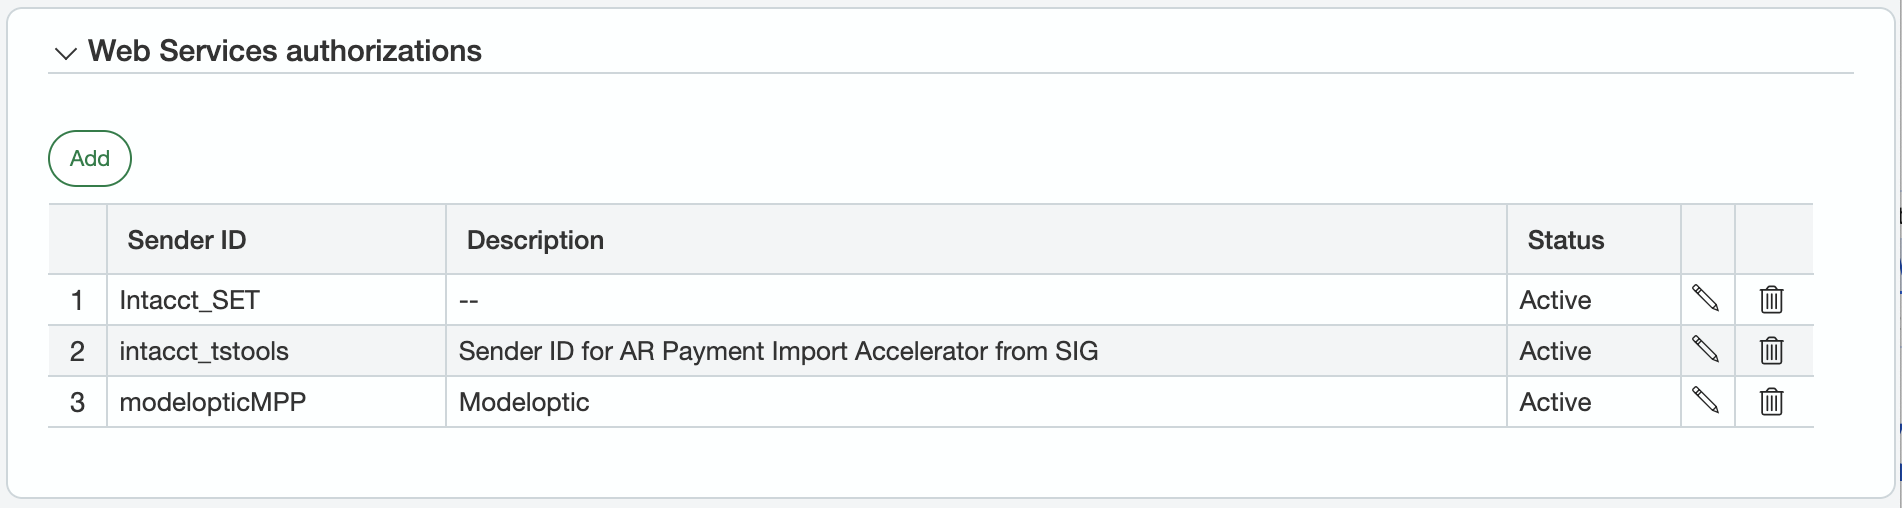
- Go to the section labeled "Web Services authorizations" and click "Add"
- Under "Sender ID", enter: modelopticMPP
- Under "Description", enter: Modeloptic
- Be sure the status is set to Active
- Hit Save twice (once in the authorizations menu, and once in the company settings menu).
User Authorization
Instructions vary slightly depending on if you use "User-Based" or "Role-Based" security.
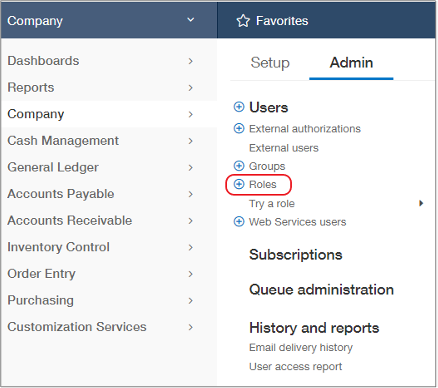
[OPTIONAL: IF YOU ARE USING "Role-Based" Security]: Create a Role
- Go to Company -> Admin -> Roles (click the plus sign next to it)
- In the Name and Description fields, enter: Modeloptic
- Click SAVE
-
Check the boxes for the following lines, and for each, click on the "Permissions" link, click the "Read only" option within each section, then click "Save":
- Company
- General Ledger
- After clicking the "Read only" options, find the "User-defined books" line and also select the "List" and "View" permissions
- Accounts Receivable
- Accounts Payable
- Consolidation (if applicable)
- After clicking the "Read only" options, find the "Manage books" line and also select the "View" permission
- Click Save
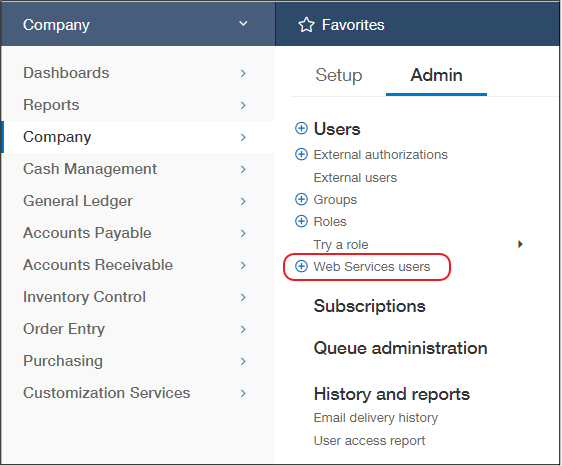
Create a Web Services User
- Go to Company -> Admin -> Web Service Users (click the plus sign next to it)
- For User ID, enter: modeloptic-user
- Fill out contact information for whoever is managing your Modeloptic Account
- After you complete the rest of the steps in this section, Sage will send an email to the email address you enter containing credentials that will need to be entered into Modeloptic to enable access your Sage account
- Set User type to: Business
- Set Admin privileges to: Limited
- Set Status to: Active
- [OPTIONAL: IF YOU ARE USING "Role-Based" Security]: Click on the "Roles information" tab and select the Role created in the prior step
- Click SAVE
- Ignore any warning that there will be a charge for creating the User (you won't be charged)
Enter User Credentials into Modeloptic
Log in to Modeloptic, navigate to the Historical Data page for your company, and click into your Sage Intacct Data Connection. You should see a section that looks as follows:
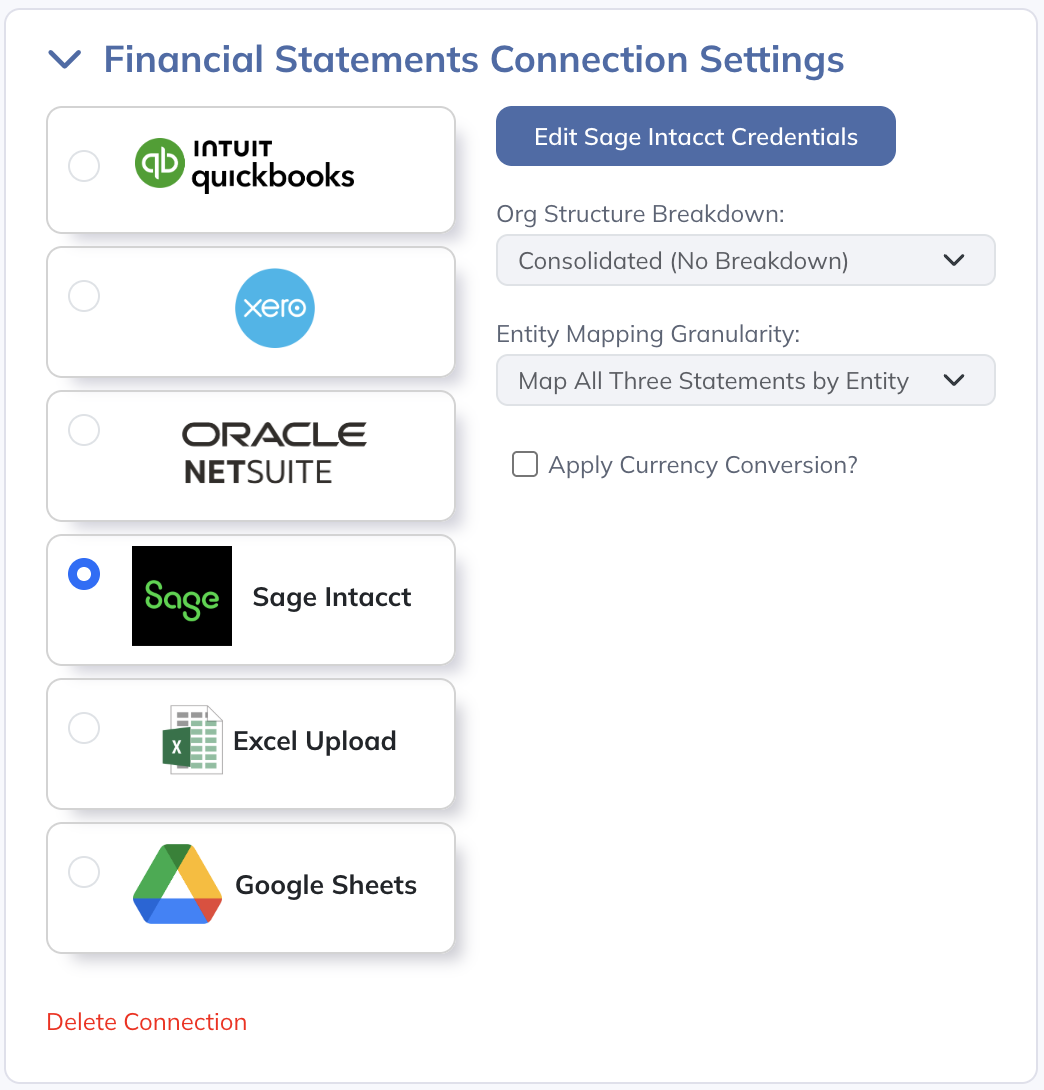
Click on "Edit Sage Intacct Credentials", which will open up the following screen:
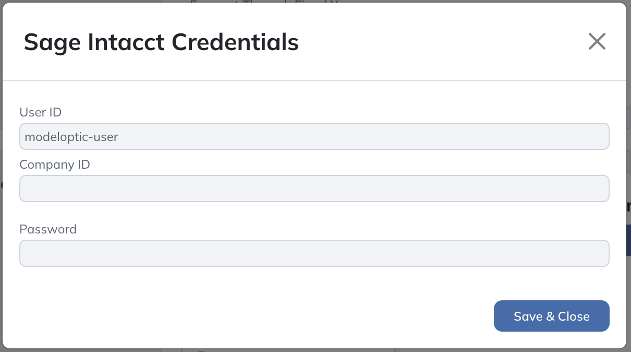
After finishing the "Create a Web Services User" step above, you should have received an email that shows your Sage Intacct Company ID and Password for the Web Services User that you created. Enter those here, and click "Save & Close".
Your integration should now be live!
Powerful and Intuitive Financial Reporting and Projections
© 2025 Modeloptic, LLC. All Rights Reserved.
The Future of Finance
Ready to try out Modeloptic for your company?
Powerful and Intuitive Financial Reporting and Projections
© 2025 Modeloptic, LLC. All Rights Reserved.