Thanks for signing up for our free trial! Since we have an integration with your accounting system, you'll already have a starting point for your chart of accounts and forecast built in your account.
The first topic we'll cover is how to add more detail to your forecast.
The inital projection set that was created for you will have some basic options pre-set. All of those initial settings should just be seen as a starting point, and you should tailor them to capture the specific nuances of your company.
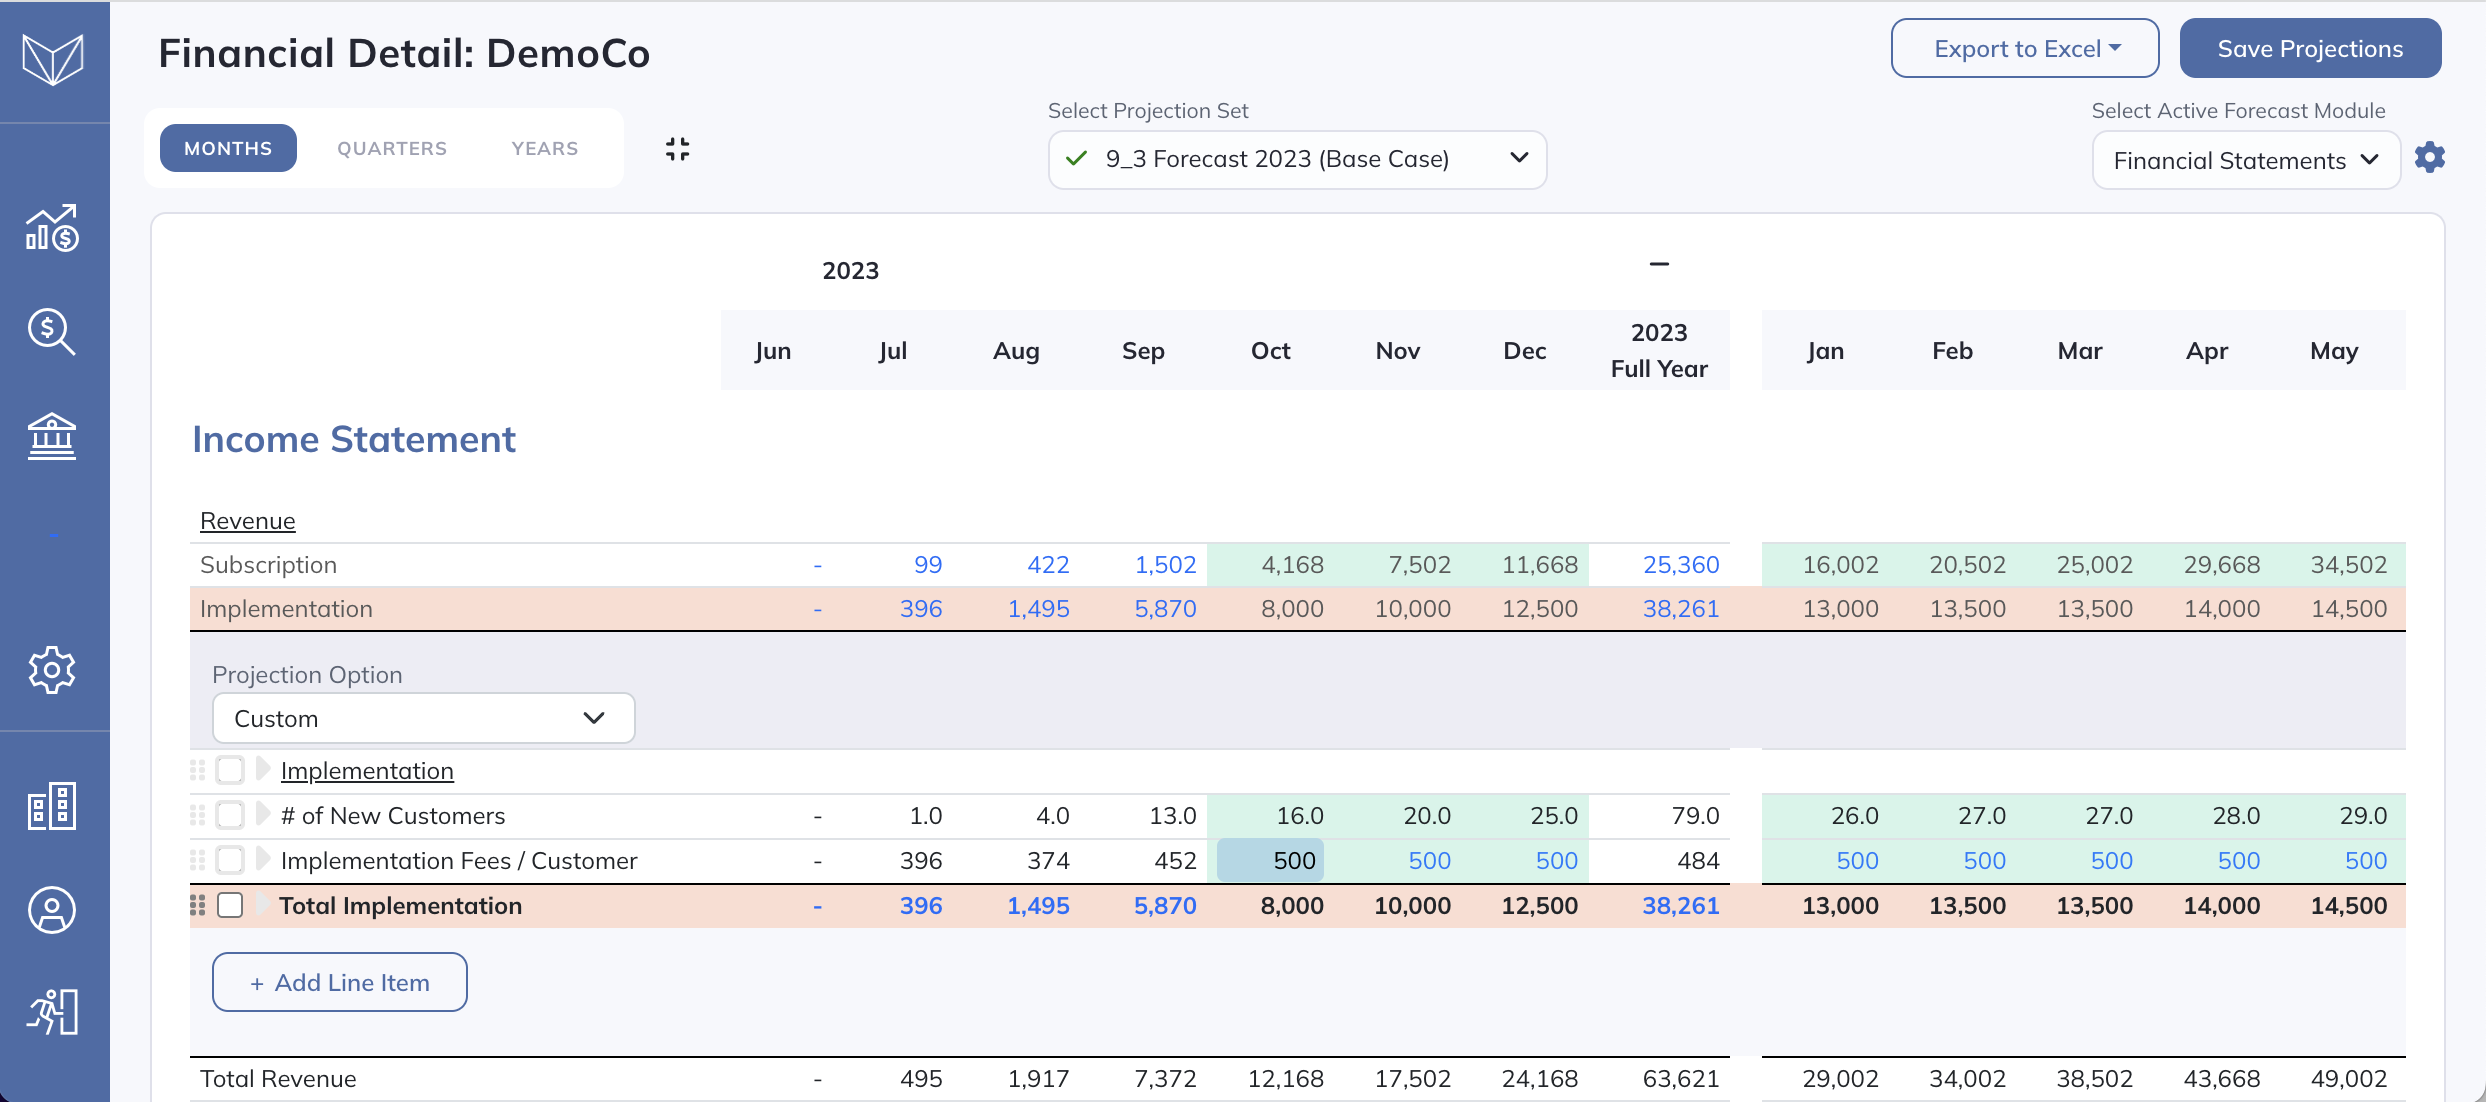
Your forecast logic lives on the Model page:
Each line item can be forecast either via built-in options (like % of revenue or trailing average) or via custom logic.
For an overview of the built-in options, see the Basic Forecasting guide.
For an overview of forecasting with custom logic, see the Advanced Forecasting guide.
One of the core concepts underpinning how Modeloptic (and how financial modeling in general) works is the idea of a table. Modeloptic gives you powerful tools for building, managing, and composing these tables.
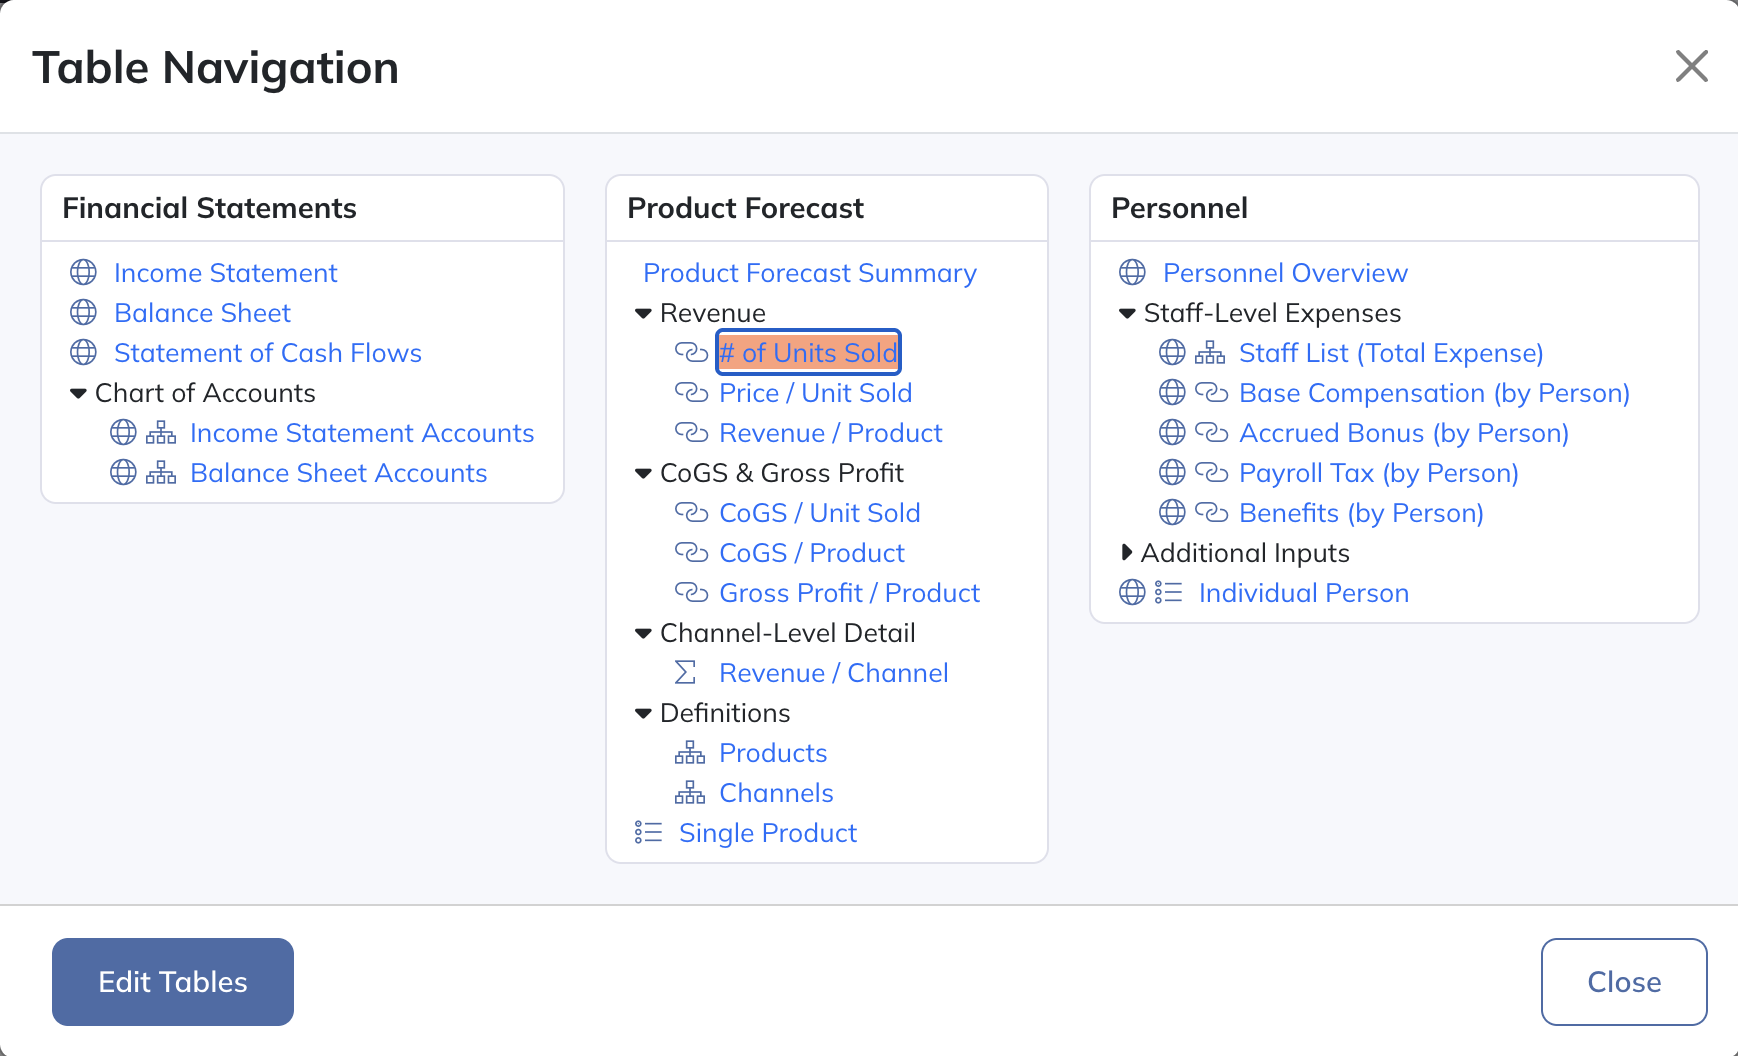
To navigate between the tables in your model, you can use the Table Navigation screen, which can be accessed by clicking the name of the active table in the top left:
That will open up the Table Navigation screen, which looks like this:
If you click on "Edit Tables" in the bottom left of this screen, you'll be able to add new tables, delete existing tables, and reorganize your table layout.
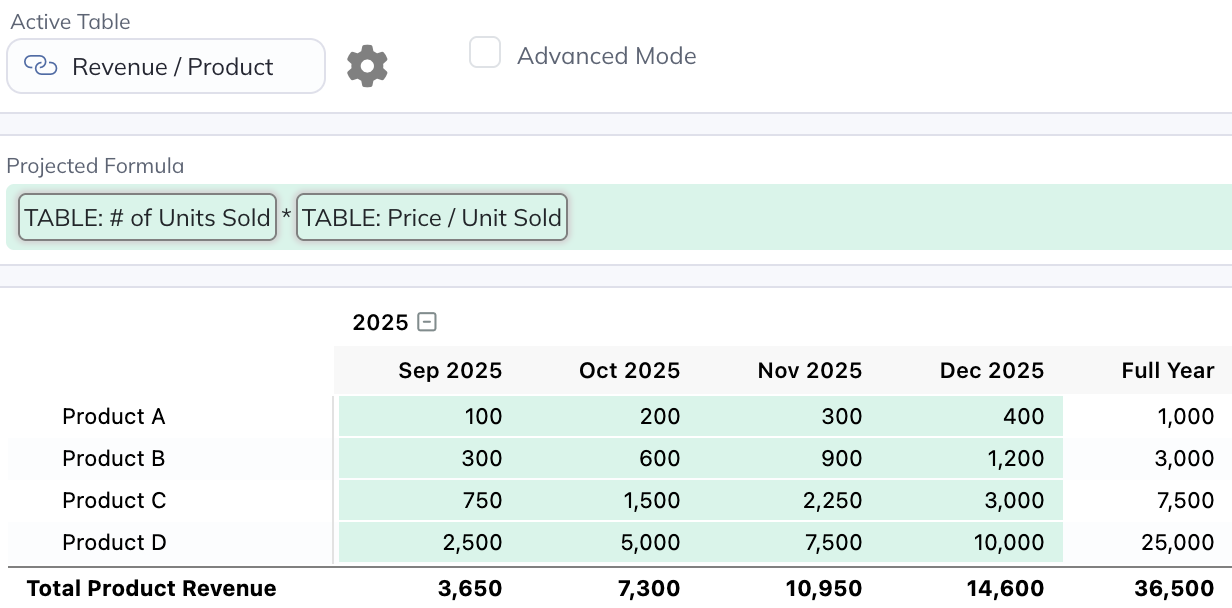
Modeloptic allows you to use a variety of table types to construct your model. The simplest is a Free-Form table, which allows you to add whatever rows you want, and link them together however you want (much like you would in Excel):
If you're forecasting a collection of similar items (like employees, customers, product SKUs, etc), Modeloptic's more advanced table types are very powerful for forecasting these collections and managing the complexity they involve, and let's you operate on them as a group instead of as individual lines.
For more detail, see the Forecasting with Tables section of the documentation.
For a more detailed example of how powerful these tables can be, see our walkthrough here.
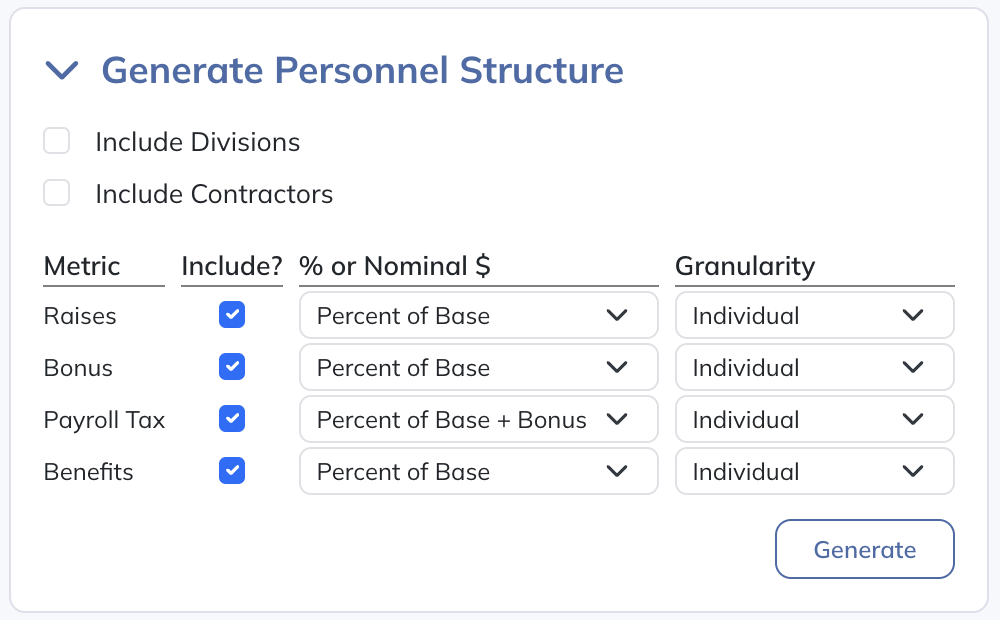
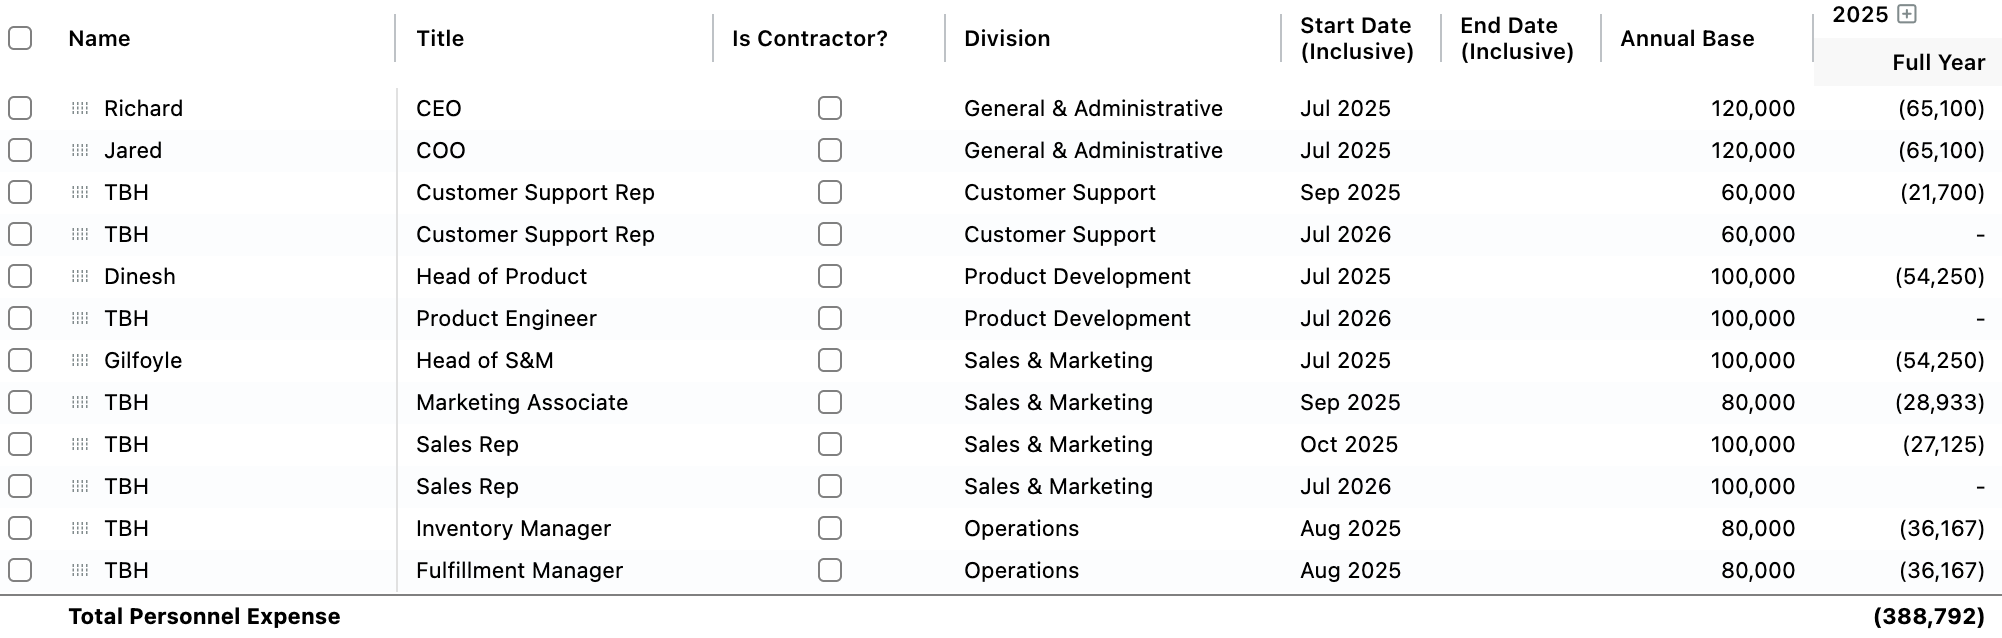
Forecasting staff-related expenses can using a collection of pre-set tables that Modeloptic creates for you:
After generating your personnel tables with the desired settings, you can then populate the tables with your own staff list and hiring plan, which will look something like this:
See the Personnel Presets section of the documentation for more detail.
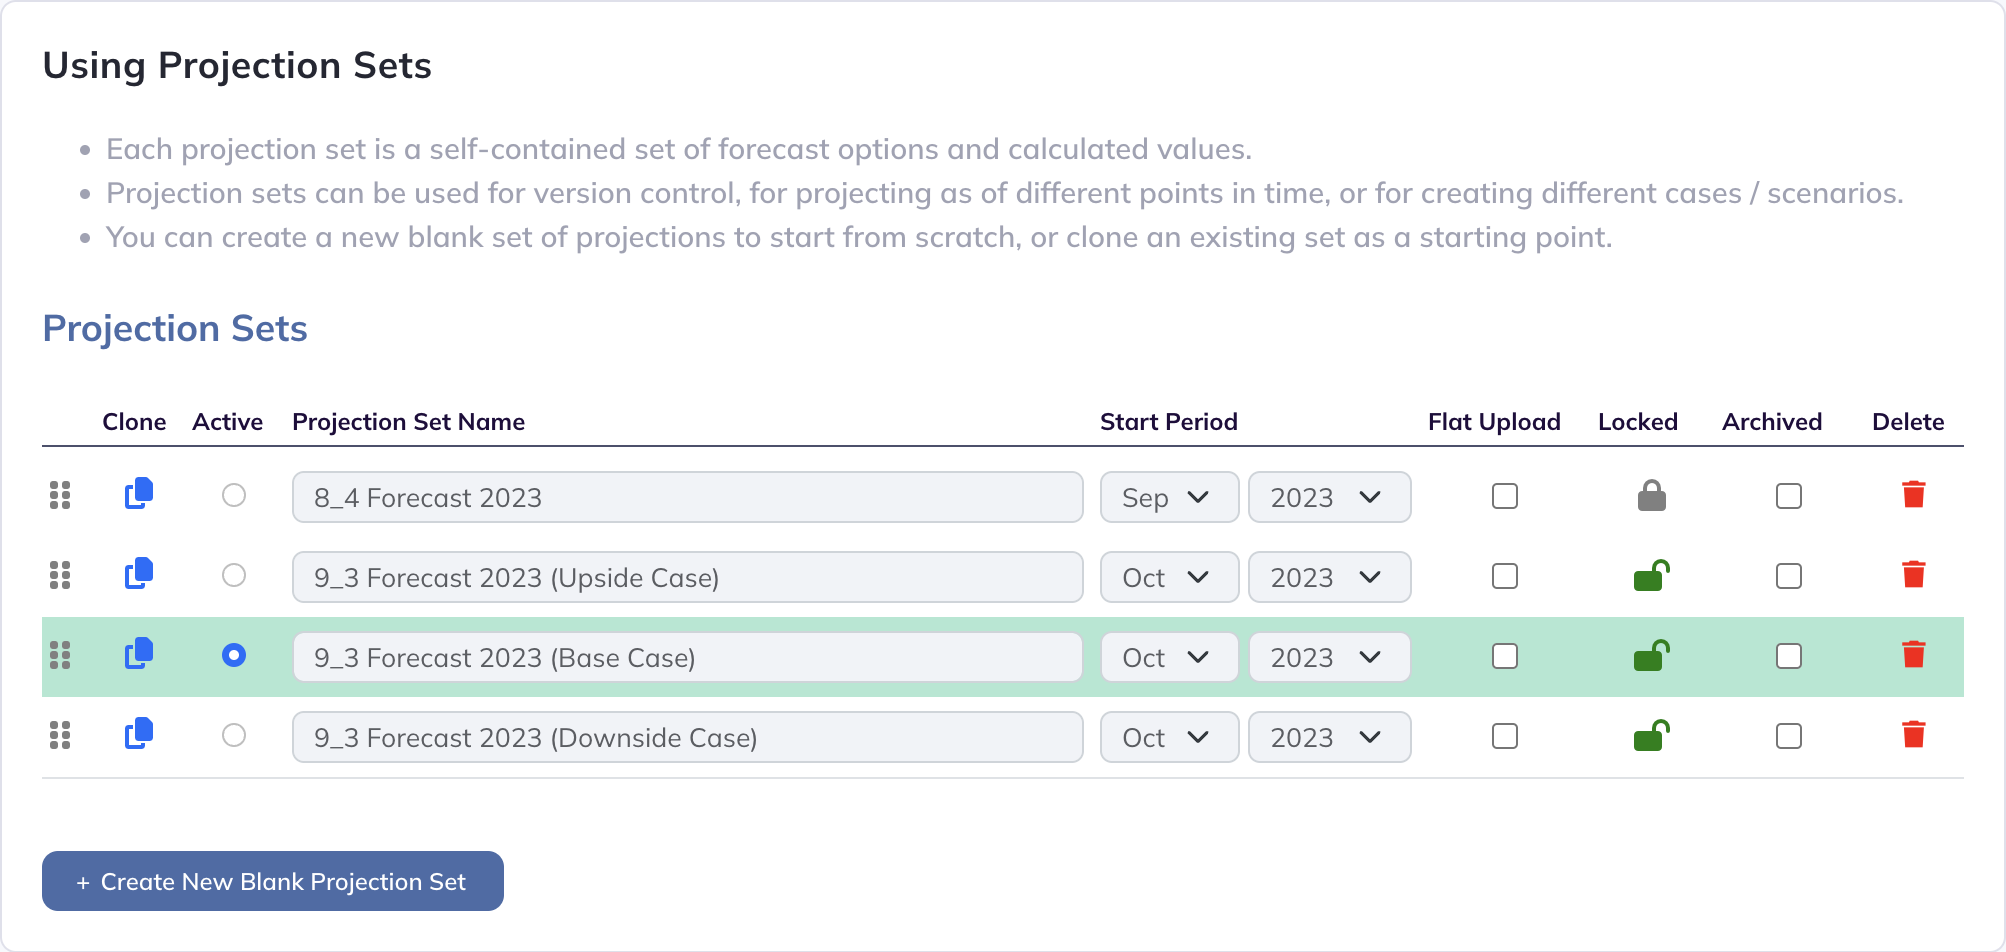
Projection sets are how different versions of your model are organized. You can think of these as different versions of an Excel file. They typically contain forecast logic as of a given point in time, or present different scenarios.
See the Projection Sets section of the documentation for more detail.
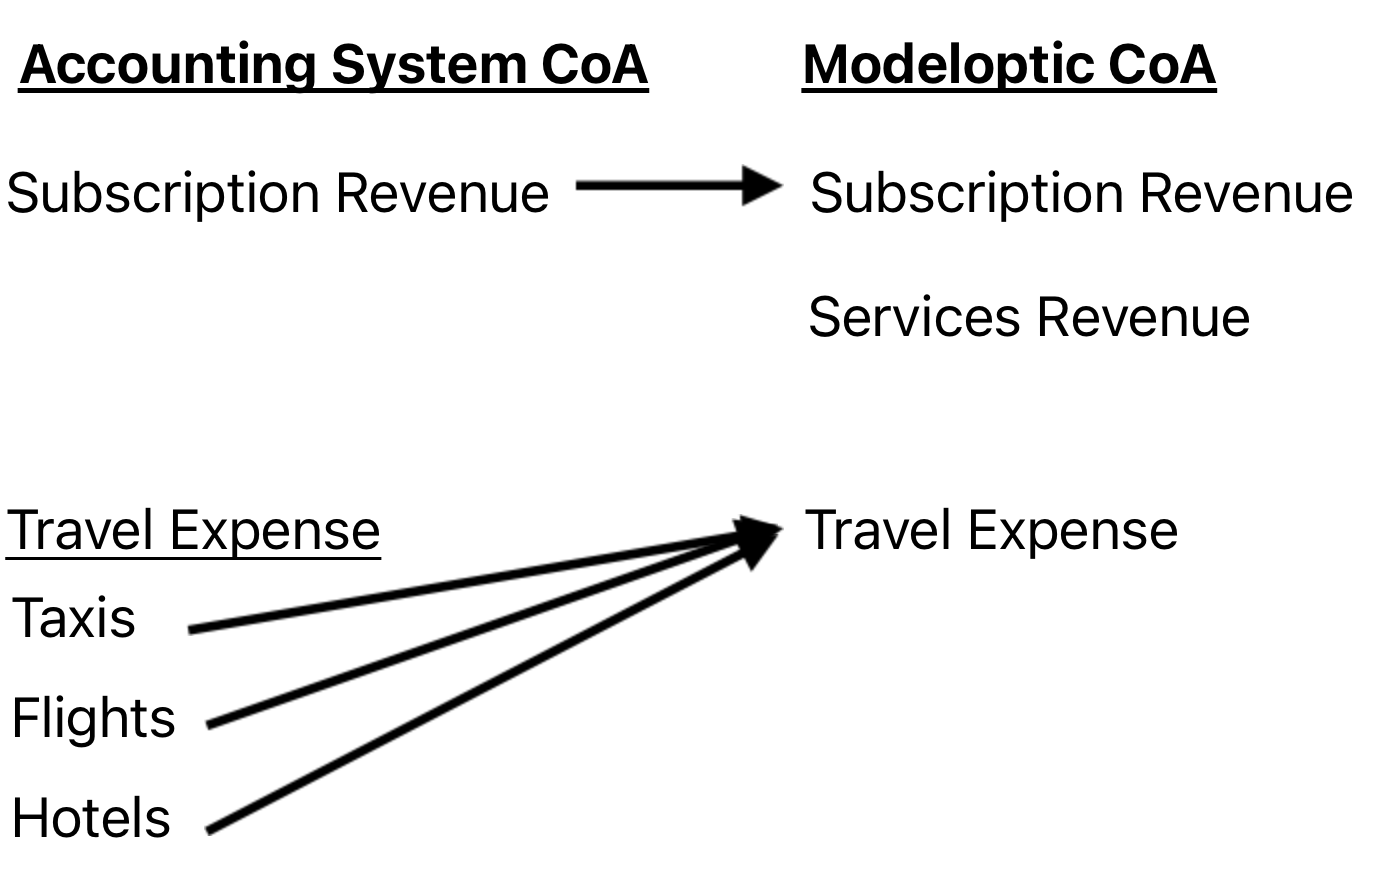
Your initial chart of accounts within Modeloptic was simply cloned from your accounting system, which you will likely want to modify.
Companies will often have a higher level chart of accounts for the sake of forecasting and reporting versus a lower level chart of accounts within their accounting system. For example, in your accounting system, you might have lines for "Taxis", "Flights", and "Hotels", but in Modeloptic you might only want a single "Travel" line.
You might also have new line items forecast in the future that don't exist historically.
For detail on how to modify your chart of accounts within Modeloptic, see the Chart of Accounts section of the documention.
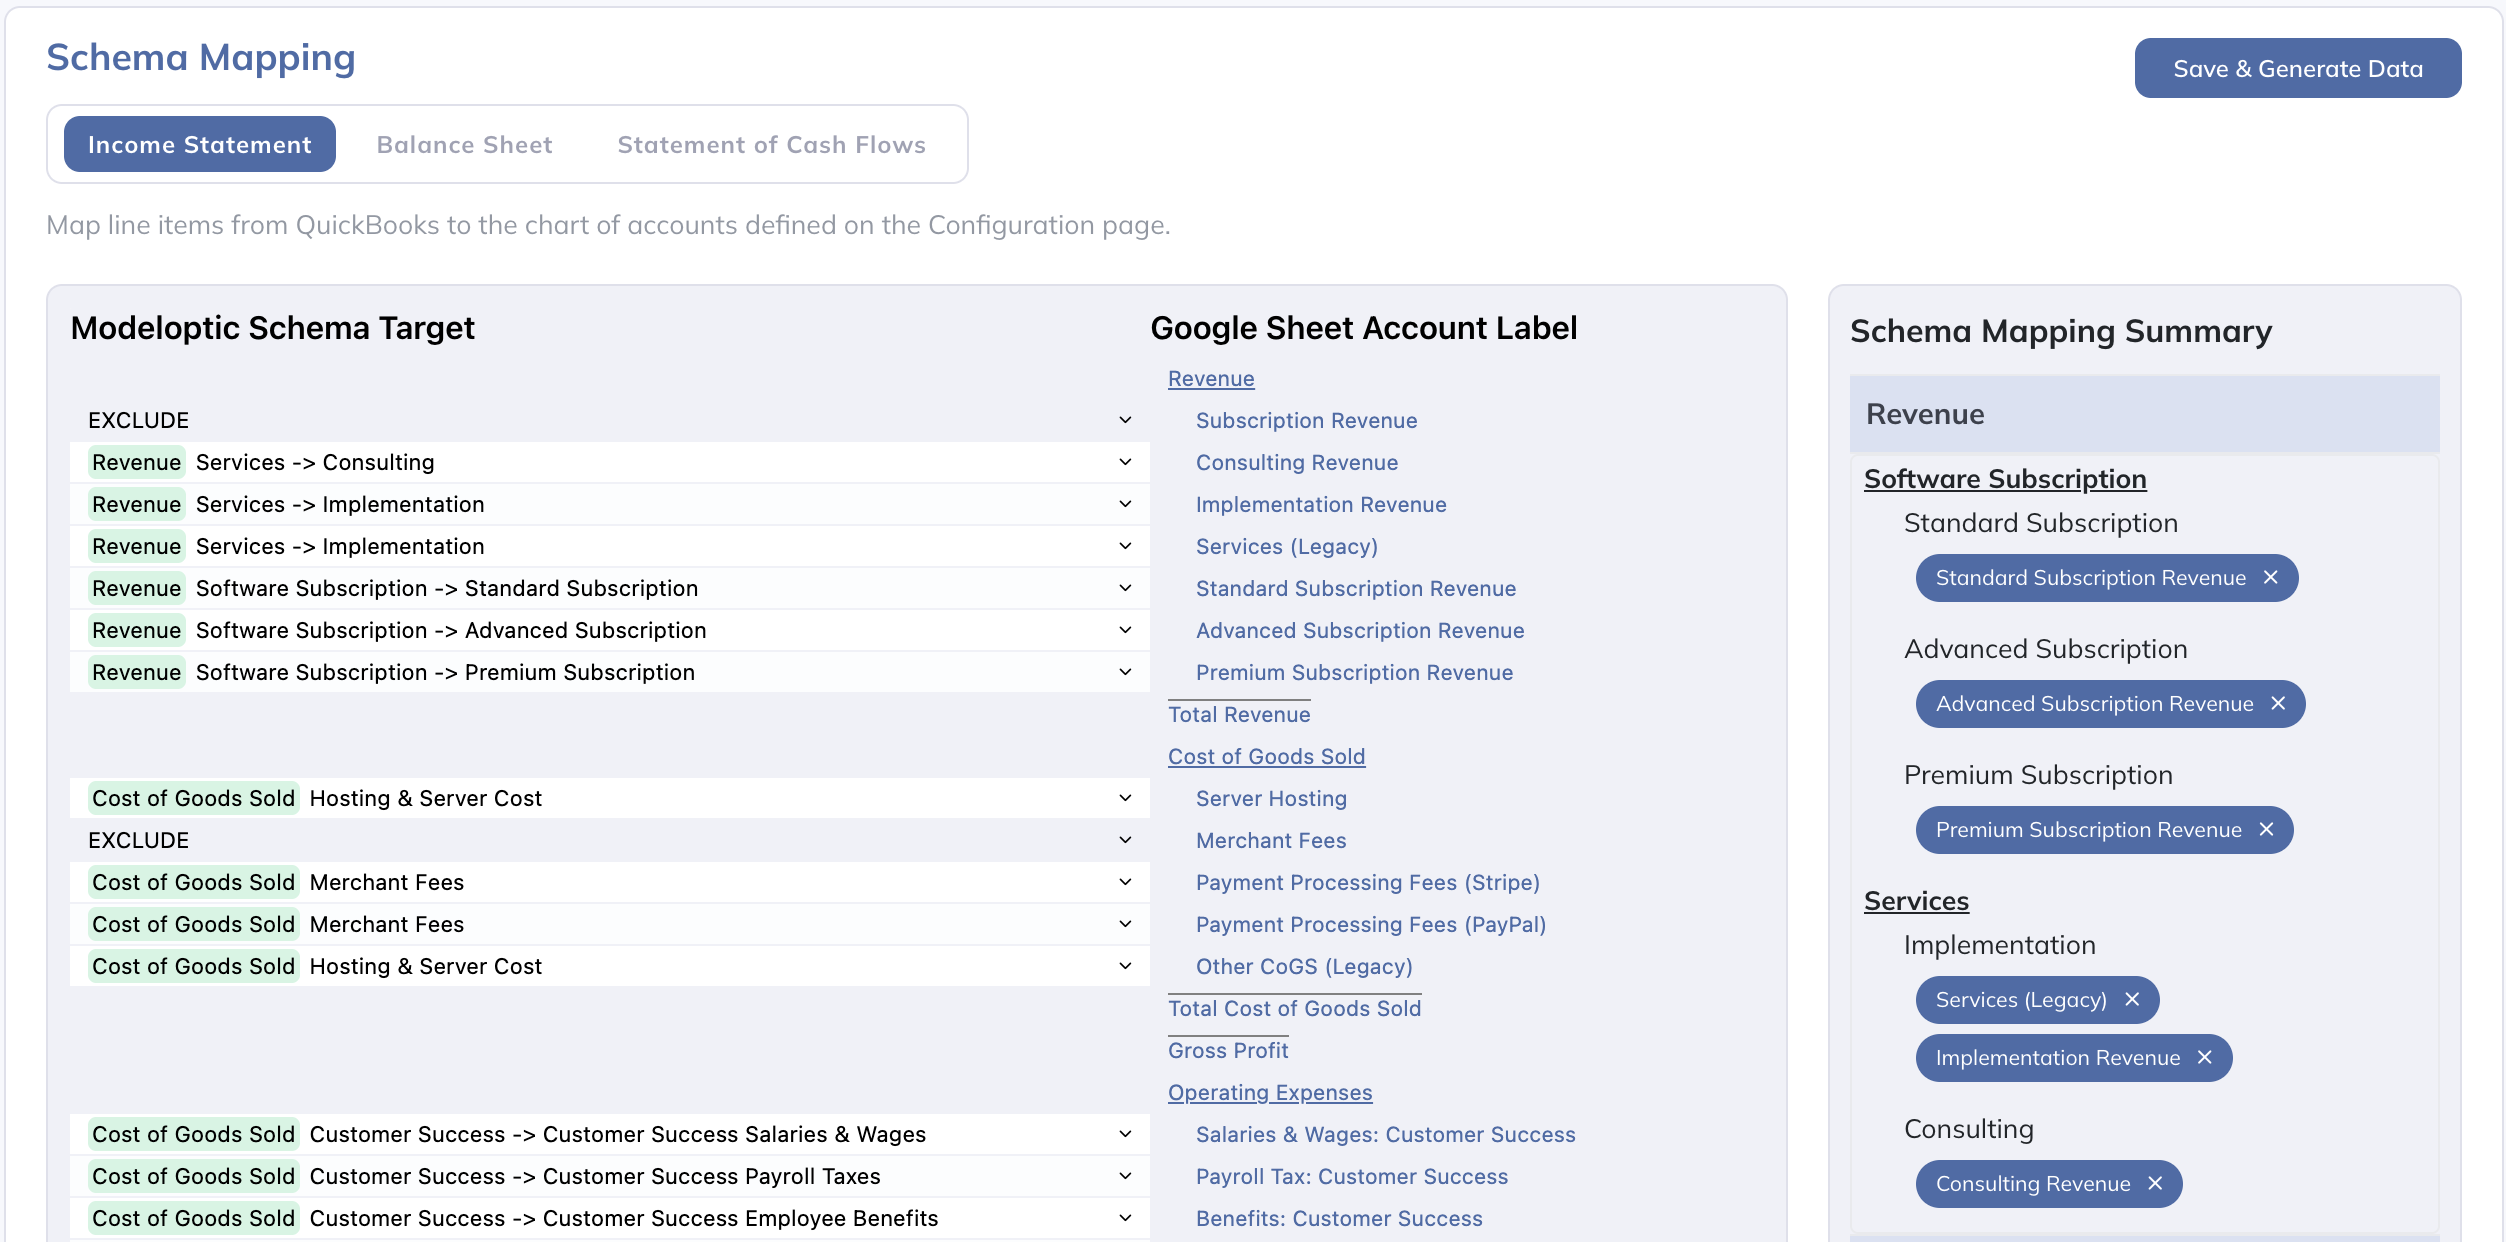
Once you've set up your chart of accounts within Modeloptic the way you'd like it for the sake of forecasting and reporting, you can update the mapping between the chart of accounts in your accounting system and your chart of accounts within Modeloptic on the Historical Data page, which looks as follows:
For more detail on how to modify your schema mapping, see the Schema Mapping section of the documention.
When you're ready to refresh your historical data within Modeloptic, navigate to the Historical Data page. Make sure your Latest Historical Period is set to the appropriate period, and click the Refresh button:
Once your refresh completes, make sure to map any new lines in your chart of accounts (if there are any), then hit the "Save & Generate Data" button.
For more detail on this process, see the Historical Data section of the documention.
There is a lot more to know, but this should be enough to get you started!
As a reminder, building out an entire company forecast is an intensive task. This trial is just intended to give you a taste of what Modeloptic is capable of to help you make a decision if it will fit your needs.
If you'd like to learn more about how Modeloptic works, feel free to take a look through our documentation.
If you have any questions for us, please feel free to contact us. We'd love to hear from you!