
Advanced Mode
Overview
Advanced Mode lets you make quicker edits to your forecast logic, and also lets you make edits in bulk. Click on the "Advanced Mode" toggle in the top center (or press the "a" hotkey) to enable it:
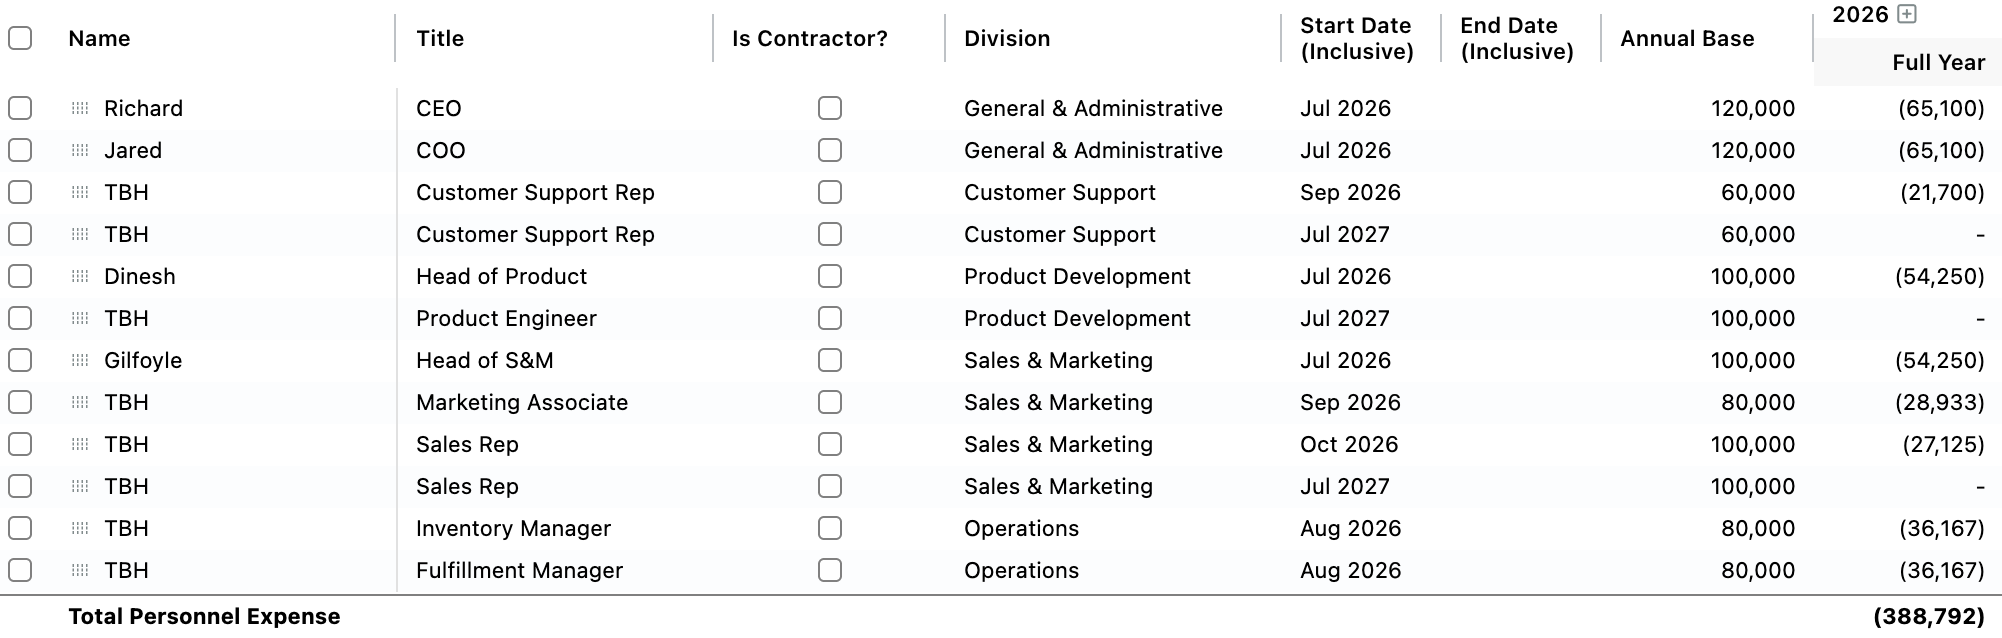
When Advanced Mode is active, and depending on what selections you made in the Show / Hide Columns menu inside the Edit Table Settings screen, your Table will look something like this:
Collection Table settings can apply formulas for historicals, projections, and aggregations at the table level, removing those controls from individual rows in Advanced Mode. See Table Types for details.
For the most part, any option that's available to set in Advanced Mode can also be set in Basic Mode, with the following exceptions:
- If the Projection Option is set to "Trailing Average", the two related options for "Trailing Average Period" and "Trailing Average Future Year Growth Rate %" can only be set in Basic Mode
- If the Projection Option is set to "Split by Period", the remaining forecast options can only be set in Basic Mode
- Comments are only visible in Basic Mode
- Sub-Tables must be configured in Advanced Mode
Moving Rows
You can reorder a single row inside a Table in Advanced Mode by clicking on the grip icon on the left side of the row and dragging it to a new destination inside the Table. Note that One-to-One and Analysis Table Types don't allow for reordering (that must be done in the parent Table or the referenced Table, respectively).
You can move multiple rows at once by selecting them using the checkbox on the left-hand side of the screen, and then right clicking somewhere inside your selection. This will open the bulk selection context menu which looks something like this:
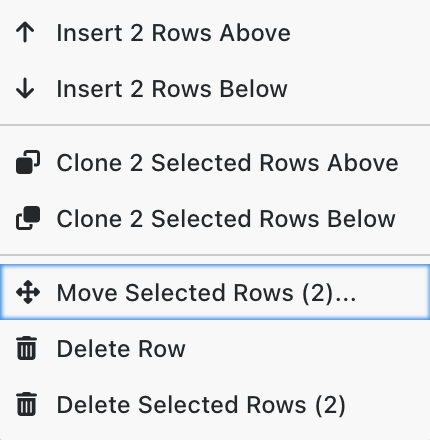
To move the selected rows somewhere else inside your model, click on the Move Selected Rows option, which will open the Move Selected Rows screen which looks like this:
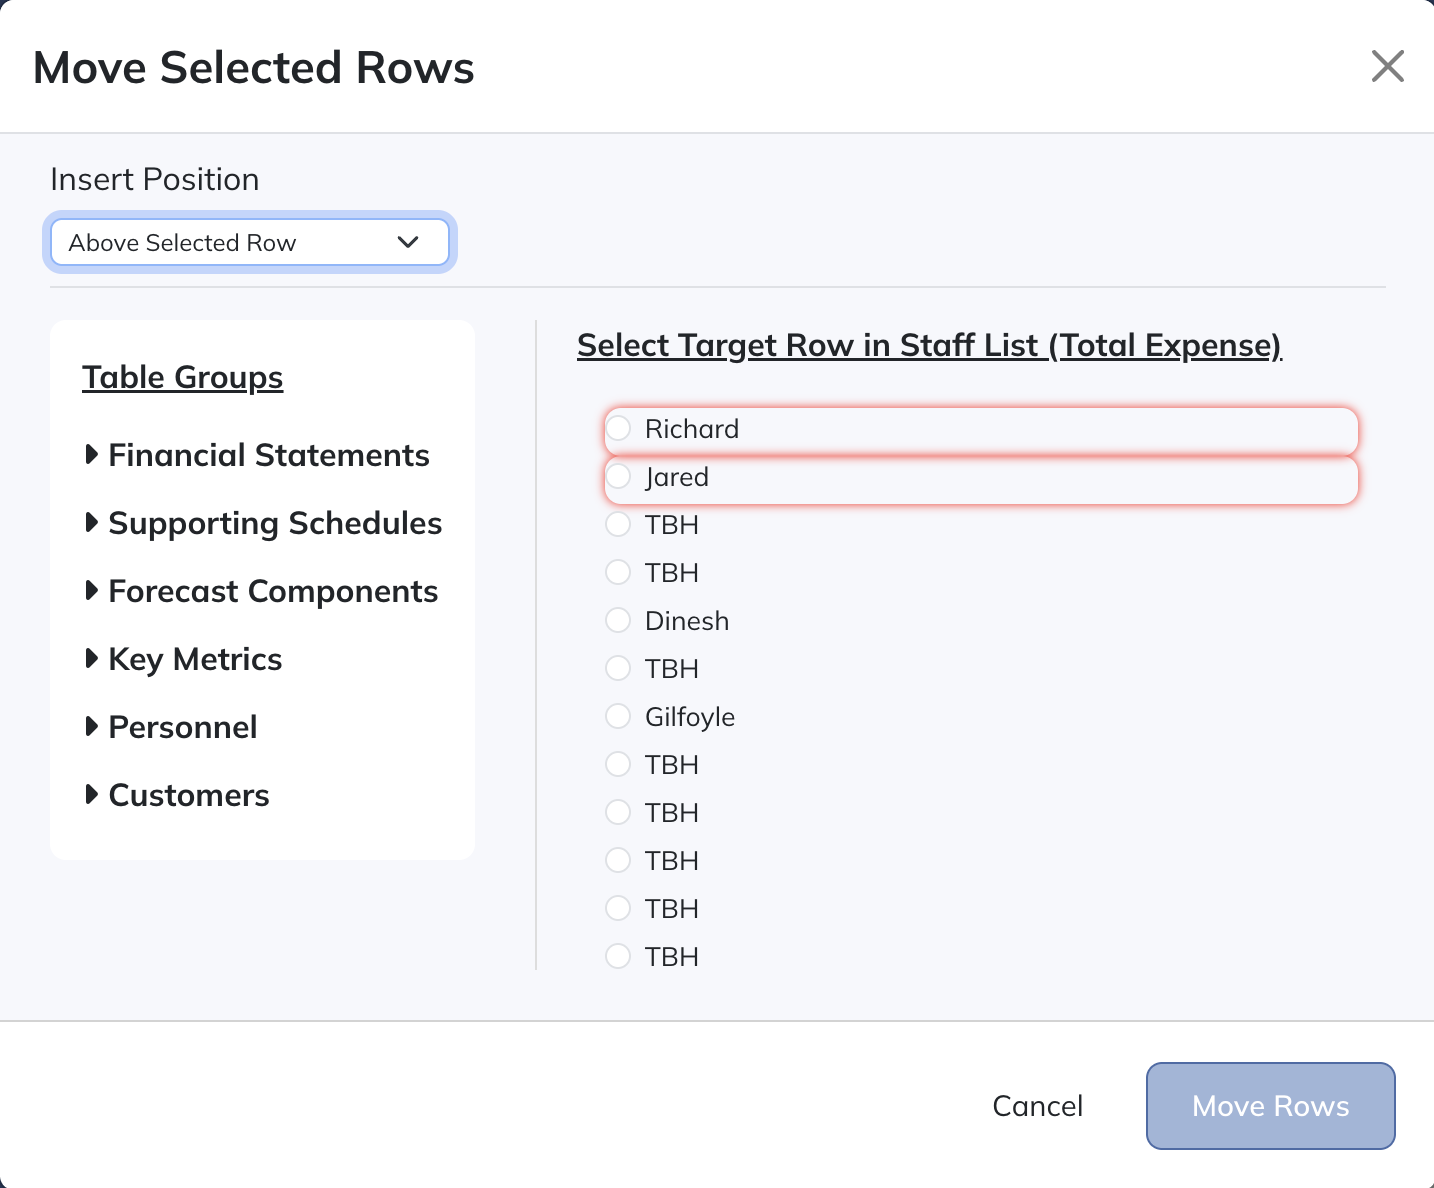
Here, you'll be able to navigate through all the existing Tables in your instance using the Table Groups section on the left side of the screen. Once you select what Table you'd like to move your rows into, look at the Select Target Row section of the screen. Make a selection that corresponds with where you want to move your selected rows. Finally, look at the top of the modal and make a selection inside the Insert Position dropdown menu. You can choose to insert your selected rows either Above the Selected Row or Below the Selected Row. Once all these selections have been made, select "Move Rows" in the bottom right-hand corner of the screen and your rows will be moved.
Moving rows between Tables applies to Collection Tables. Rows inside a View are reordered by dragging them within the View.
The other options available inside the bulk selection context menu will be explained below.
Special & Bulk Operations
Right clicking in your Table while in Advanced Mode will open a Context Menu that makes editing / adding logic much easier and more efficient. If you right click in your Table, a context menu will open that looks something like this:
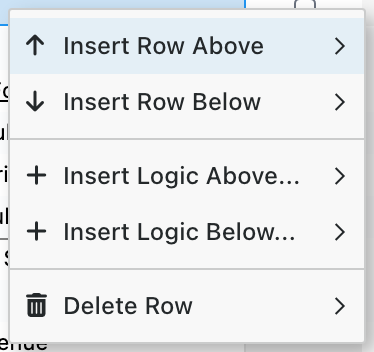
This menu contains the following options:
- Insert 1 Row Above: If selected this will insert a new row above the line that was selected when the context menu was opened
- Insert 1 Row Below: If selected this will insert a new row below the line that was selected when the context menu was opened
- Insert Logic Above: If selected this will open another menu with 3 options
- Add Screw Block: This will add a block of 5 lines that create a corkscrew calculation that tracks additions and reductions to a balance. A good use case for this kind of logic would be tracking a user cohort that would drive a hypothetical revenue calculation.
- Add Sum Block: This will add a block of 5 lines that create a sum calculation where a default of 3 lines are added together to arrive at a total. This can act as a good starting point for creating sum calculations.
- Add Autosum Line: This will add a line that sums everything above it up to the first non-logic line type which can be useful if you're trying to sum several lines without manually creating a sum formula using the Historical Formula & Projection Formula configuration options.
- Insert Logic Below: If selected this will present the same 3 options as the Insert Logic Above option but will insert the selection below the line that was selected when the context menu was opened
- Delete Row: If selected this will delete the line that was selected when the context menu was opened. In a View, this is split into two options: "Remove Row from View" removes the placement but keeps the underlying Logic Row available under Logic Rows, while "Delete Logic Row (all views)" removes the row from every View it appears in and deletes the Logic Row itself
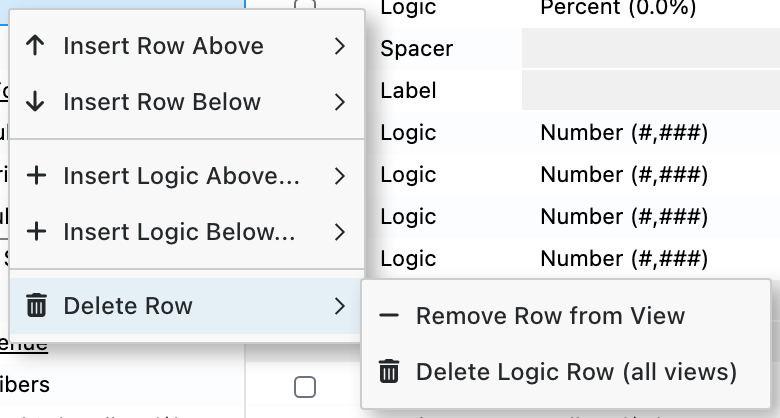
A few additional options will become available if you open the context menu after selecting rows using the checkboxes on the left-hand side of the screen while in Advanced Mode. If you select lines and then right-click on the line selection, a context menu will open that looks like this:
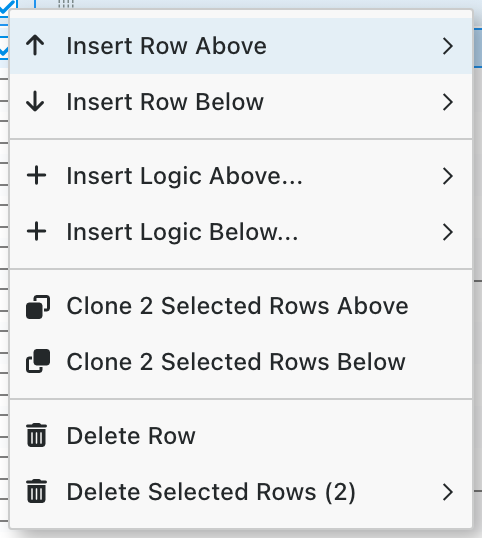
You'll be able to insert the number of rows you have selected above or below the selection, Insert the same logic described above (Screw Blocks, Sum Blocks, Autosum lines) either above or below the selection, clone the selected rows above or below the selection, delete the selected rows, or move the rows as described above.
Inside a View, a few of these behave differently: deleting a bulk selection removes those rows from the View (the underlying Logic Rows are kept), cloning creates new Logic Rows backing the cloned lines, and Move Selected Rows is not available — reorder rows within a View by dragging them instead.