
Model Structure & Navigation
Overview
A Modeloptic model is built from three kinds of object. A Logic Row holds one line’s inputs or formula for every period. A View is a page that displays Logic Rows; it holds no calculations of its own. A Collection Table holds a list of similar items, such as employees, products, or contracts, that share columns and formulas.
A View doesn’t contain its rows; it displays them. Each appearance of a Logic Row in a View is a placement, and one Logic Row can have placements in several Views. Edit the row from any of them and every placement shows the change, because they all display the same row.
| Belongs to the Logic Row (same in every View) | Belongs to the View (this View only) |
|---|---|
| Line Label and number format | Which rows appear, and in what order |
| Historical, projection, and aggregation options | Headers, labels, and spacers |
| Formulas and inputs | Bold, italic, and borders on each placement |
| Global Row? (sharing across Projection Sets) | Label Alias on each placement |
Formulas point at the Logic Row, not at a placement, so removing a placement never breaks a formula. Deleting the Logic Row does.
Two kinds of group keep a model organized. Model navigation groups hold Views and Collection Tables, and each top-level group becomes one worksheet when you export to Excel. Logic Row Groups organize the Logic Rows themselves. A row’s Logic Row Group has no effect on which Views display it.
The Income Statement, Balance Sheet, and Statement of Cash Flows are Views too. Their account rows come from your chart of accounts.
Everything on the Model tab belongs to the selected Projection Set and, in a multi-entity company, the selected entity. Select them before you edit. Model Navigation then opens the financial statements, Views, Collection Tables, and Logic Row Groups for that selection.
Logic Rows, Views & Collection Tables
| Model Part | What It Holds | Example |
|---|---|---|
| Logic Row | One input or calculation, with values across periods | Units Sold, Price per Unit, or Revenue |
| View | Placements of Logic Rows, with headers, labels, and formatting | A Revenue Build showing inputs and calculations together |
| Collection Table | Similar items with common columns and forecast options | Products, with one row per product |
Kinds of Rows
Rows appear in several places, but they are not all the same kind of object. Where this guide says Logic Row, it means the first kind below.
| Row | Where It Lives | What to Know |
|---|---|---|
| Logic Row | A Logic Row Group, listed under Logic Rows in Model Navigation | Can have placements in any number of Views. + Logic Row creates this kind of row. |
| Financial-statement row | The Income Statement, Balance Sheet, or Statement of Cash Flows | Account rows come from your chart of accounts and are managed by Modeloptic. |
| List-Scoped row | One List-Scoped View | Belongs to that View alone. It calculates one series, which depends on the selected item only through the Sub-Table rows it references. |
| Collection Table row | Its Collection Table, one row per item | Appears in a View through a Sub-Table and stays part of its table. |
Example: A Revenue Model
For a simple revenue build, create three Logic Rows: Units Sold, Price per Unit, and Revenue. Enter assumptions in the first two and set Revenue’s formula to Units Sold × Price per Unit. Arrange all three in a View named Revenue Build.
To show the same build next to expenses in another View, add placements of those Logic Rows there instead of creating new rows. Editing a formula or input in either View then updates both for the selected entity and Projection Set.
For a product-by-product forecast, use a Collection Table instead: one row per product, with a single formula written once for every product.
You can combine both approaches: a Logic Row can reference a Collection Table’s total, and a View can show the product detail using a Sub-Table. A product row stays part of its Collection Table; displaying it in a View does not turn it into an independent Logic Row.
Start with Logic Rows in a View when your model has individual assumptions and calculations. Add a Collection Table when you need to manage a list of similar items. Continue with Logic Rows & Views for row editing and reuse, or Collection Tables for item lists and related tables.
Model Navigation
Click the current View or Collection Table name, or press q when no text field is focused, to open Model Navigation. It lists the financial statements, your model navigation groups with their Views and Collection Tables, and your Logic Row Groups under Logic Rows.
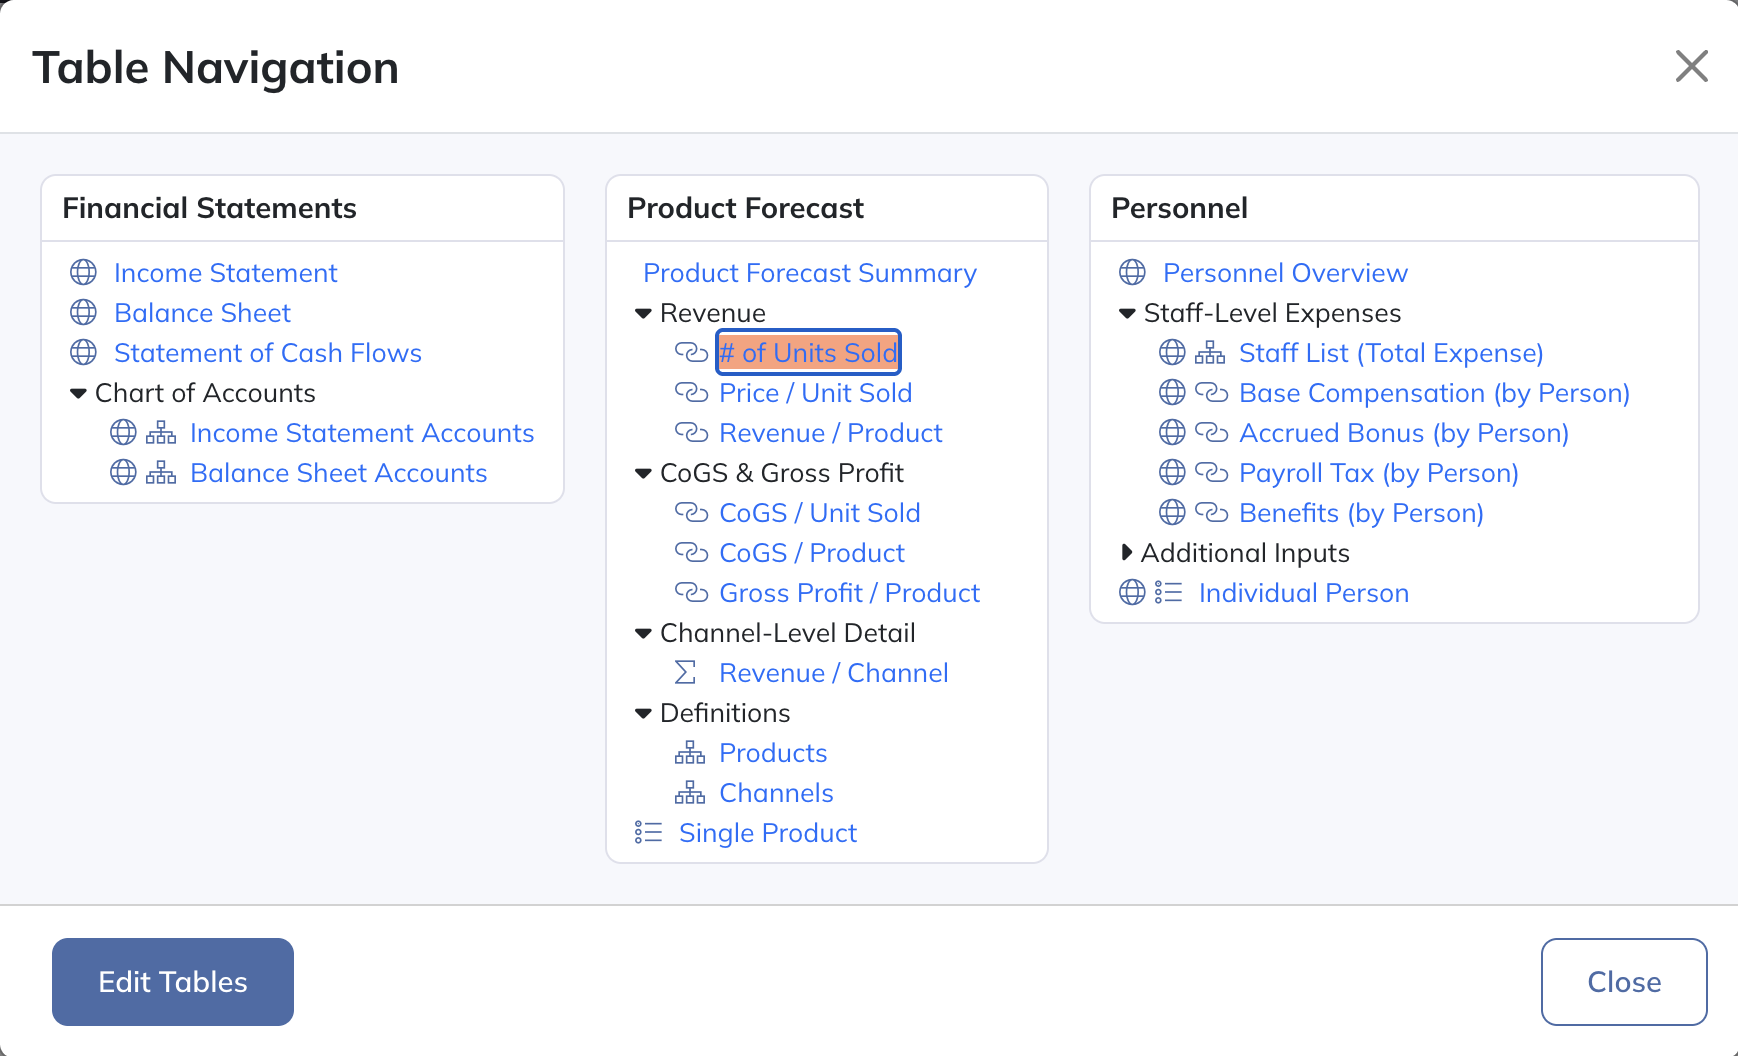
Click an item to open it, and expand a sub-group with its arrow. Icons show what each item is:
- A globe marks a global item, shared across Projection Sets.
- An org-chart icon marks a Standard Collection Table, a link icon a One-to-One Collection Table, and a Σ icon an Analysis Collection Table.
- A list icon marks a List-Scoped View. Standard Views have no type icon.
- Under Logic Rows, each Logic Row Group has a stacked-layers icon.
Hover over a Collection Table to highlight every table and View built on the same item list. The gear that appears on hover opens its Edit Table Settings.
To open a View’s settings, or to create, move, clone, or delete items, select Edit. See Organizing Your Model below.
Organizing Your Model
Open Model Navigation and select Edit, or press e, to create and organize Views, Collection Tables, and model navigation groups.

A model navigation group holds Views and Collection Tables. A Logic Row Group organizes the Logic Rows themselves and appears separately under Logic Rows. See Logic Row Groups for that workflow.
Create Groups, Views & Collection Tables
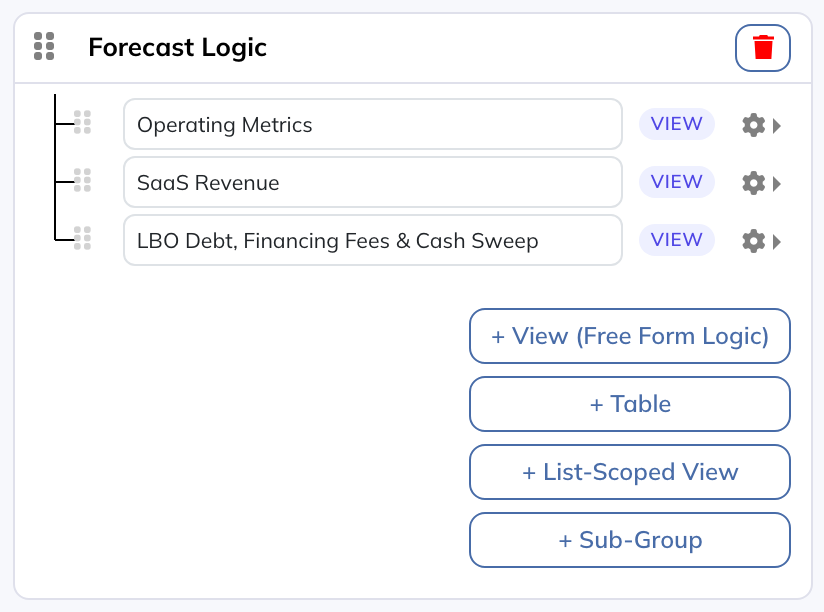
Select + Create New Group to add a model navigation group.

Within a group, use these buttons to add content:
- + View (Free Form Logic): Creates a Standard View, where you arrange Logic Rows yourself.
- + Table: Creates a Collection Table for a list of similar items.
- + List-Scoped View: Creates a View that shows one item of a Collection Table at a time.
- + Sub-Group: Creates a sub-group within the model navigation group.
Rename and Move
Click a name to rename a View, Collection Table, group, or sub-group. Drag the handles to reorder them. To move a View or Collection Table to another group, open its gear menu and choose Move to Group....
Each top-level model navigation group becomes one worksheet when you export the model to Excel, so its name follows sheet-name limits: at most 31 characters, using letters, numbers, spaces, and _ - ( ) & + # $ ! @ ~ ^ < >. Other characters are ignored as you type.
Settings, Cloning & Deletion
In Edit mode, each View and Collection Table has a gear menu. A View’s menu is shown below:
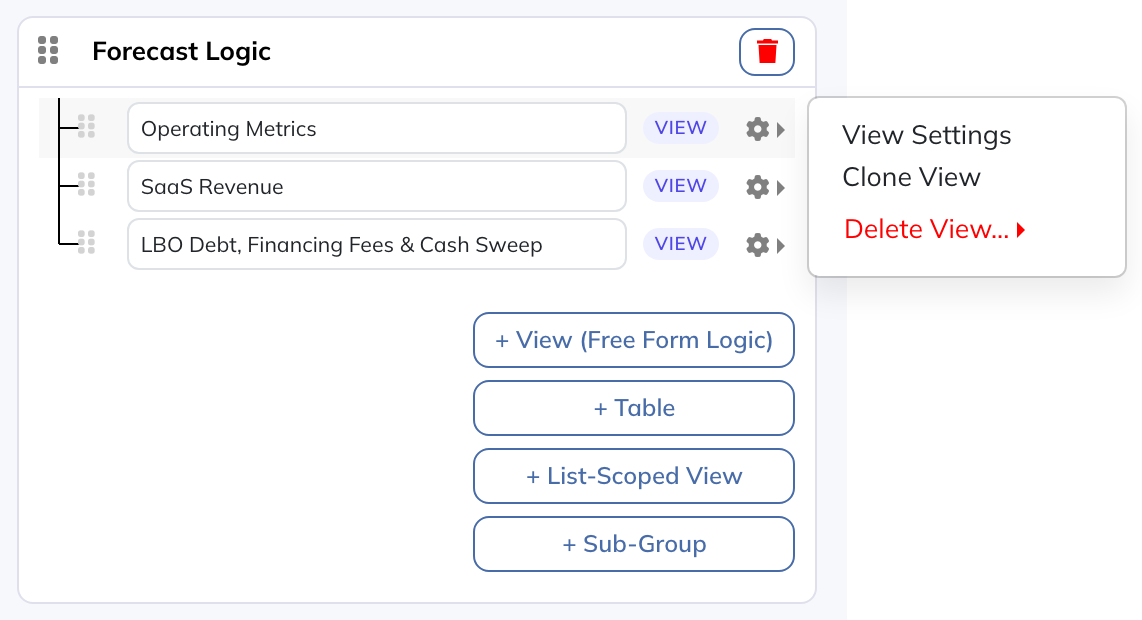
- View Settings opens the selected View’s settings. See Views.
- Table Settings opens the selected Collection Table’s settings. See Edit Table Settings.
- Clone View creates a new View with new copies of its Logic Rows. Editing the copies doesn’t change the originals. Clone Table copies a Collection Table.
- Delete View... offers Delete View Only, which keeps the View’s Logic Rows, and Delete View + Logic Rows, which also deletes the rows no other View displays. Delete Table deletes a Collection Table.
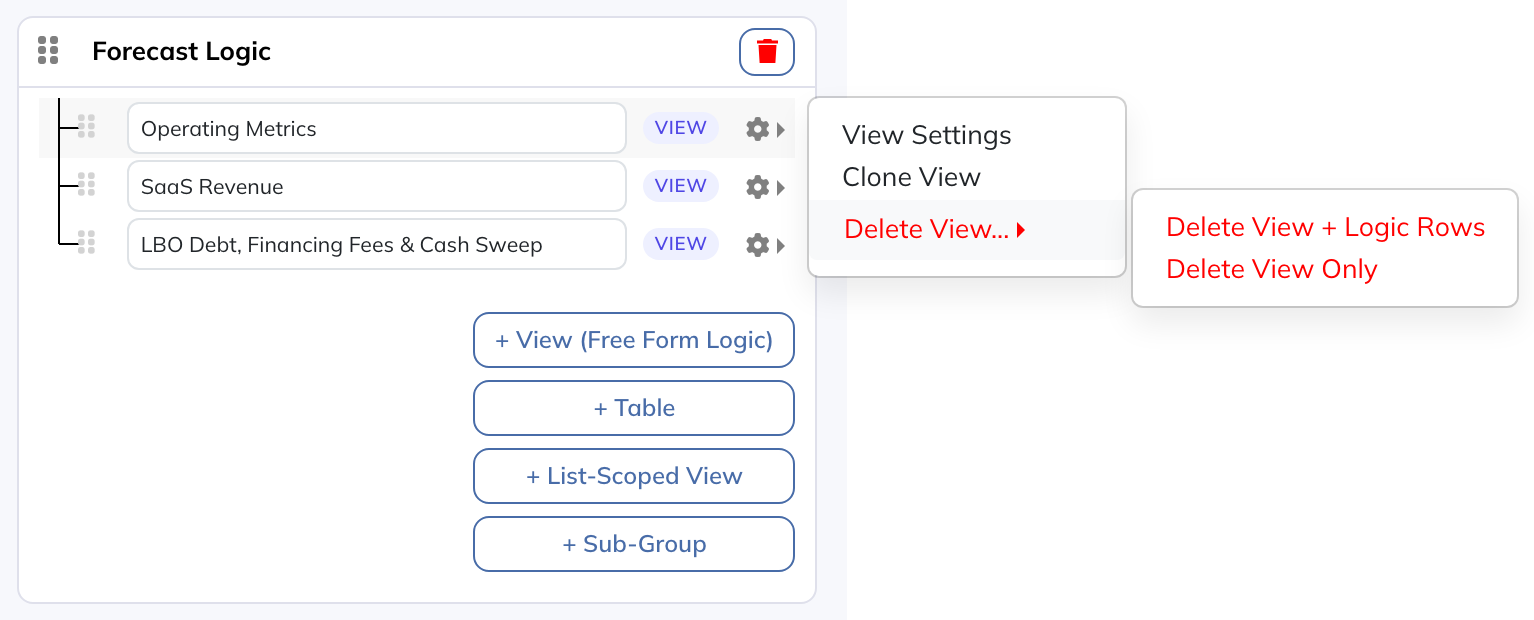
Delete View + Logic Rows can delete rows that formulas elsewhere still use. Review Cloning, Removing & Deleting before deleting a View with its rows.
A sub-group’s gear menu offers Move to Group... and Delete Sub-Group. Deleting a sub-group, or a model navigation group with its trash icon, deletes everything inside it: its Views, its Collection Tables, and its sub-groups. Logic Rows are deleted only when every placement is in a deleted View; rows also shown in another View are kept. Global tables in the group are deleted from every Projection Set. The confirmation lists how many of each will be deleted.
To edit inputs and formulas, open the relevant View or Collection Table. Those workflows are covered in Logic Rows & Views and Collection Tables.